
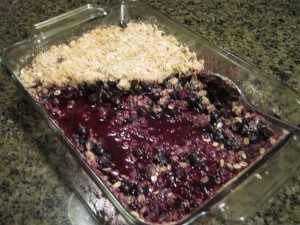
 The only regret with respect to this blog entry is that I did not snap a photo quickly enough of the Easy Whole Grain Fruit Cobbler (in this case blueberry) prior to it being devoured and the visual appeal was essentially destroyed.
Oh well, the photo does show that it was an apparent favorite! I guess that counts for something, right? (:
The girls went to an Organic You-Pick Blueberry Orchard the other day and came home with two large bags of fresh, organic blueberries! Our favorite!
Often we make this tasty dessert from fresh fruit. However, we have additionally made it with pie filling from a can. Regardless of the fruit filling of choice, what truly “makes it” is the freshly milled flour and whole grain topping.
As with all my recipes the flour called for is freshly milled flour.
Since this recipe does not require a lot of flour, the gray storage container lid for the Wondermill helps keep even the smaller portion of left-over whole grain flour fresh for weeks in the freezer after milling .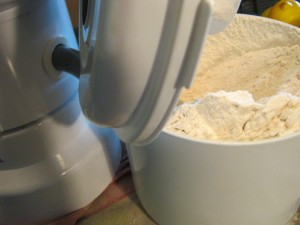
As date of this post the Wondermill is on sale with free shipping.
Click here to see the savings.
![]()
Whole Grain Fruit Cobbler
Ingredients:
- 3 Cups of sliced fresh fruits (berries, apples, or pit fruits are best)
- Option – 2 Cans Fruit Pie Filling of choice*
- 2 TBS Arrow Root Powder *omit if using canned
- 2 TBS Organic Evaporated Cane Crystals *omit if canned
- 2 Cups Organic Whole Rolled Oats
- 1/2 Cup Freshly Milled Organic Whole Wheat Flour
- 1/2 Cup Organic Evaporated Cane Crystals
- 1/4 Cup Sucanant (may substitute Brown Sugar)
- 4 TBS softened butter
- 2 tsp vanilla
9 X 13 baking dish
Coat baking dish with either butter or non-stick spray.
In a large bowl cut up fruit to equal 3 cups (may mix and try fruit combinations). Add Corn Starch and 2TBS Cane Crystals, toss to coat. Pour out into baking dish. If using canned pie filling, simply empty cans into the baking dish.
In a clean large bowl, mix Oats, remaining Cane Crystals, Sucanant and Whole Wheat flour until combined, Cut in butter then add vanilla until combined.
Pour on top of fruit mixture (but do not pat down) to cover.
Bake at 350 degrees until top is crispy and fruit is bubbly. Remove from oven and let cook for about 10 minutes so topping gets more solid (and you don’t burn your mouth!)
Top with frozen yogurt or REAL whipped cream.
What a great way to get more whole grains into your family’s diet. They’ll LOVE this dessert and you won’t feel bad about sharing this with them!
Please leave a comment if you try this recipe – and let me know what is your favorite fruit to use in it!
Until next time…
Keep playing with your food and enJOY the journey!
If you are in the Western North Carolina area – or within driving distance to the class location – today is the last day to register for the upcoming class. Cost is only $5. Check it out and see if you can make it.
When: Saturday, July 13, 2013 – from noon to 2PM
Where: Inside the Always Ready Store – 632 West Main Street, Burnsville NC 28714
![]()
Click the class name to register….
Saturday July 13 12:00 Noon -2:00 PM
Cost – $5.00
PLEASE REGISTER NO LATER THAN 48 HRS BEFORE CLASS
SPACES ARE LIMITED
DEADLINE TO REGISTER IS NOON THURS JULY 11
REGISTER BY PAYING ONLINE OR MAKING PAYMENT BY PHONE 828.536.4988
Dehydrating is one of the best ways to prolong the harvest and halt the spoiling of fresh produce (thus saving money). It requires no electricity for storage so when the power goes out, you still have shelf stable food available without all the added preservatives.
This is a class for the basics of getting started. We’ll share some ideas of what dehydrates well, what doesn’t and some things you thought maybe couldn’t BE dehydrated that can!
- Samples and recipes for some things will be included.
- Proper Storage instructions for your dehydrated foods.
- Re-hydration tips.
- Non-Electric options to dehydrating.
SPACES ARE LIMITED
DEADLINE TO REGISTER IS NOON THURS JULY 11
REGISTER BY PAYING ONLINE OR MAKING PAYMENT BY PHONE 828.536.4988
Refunds offered if:
- Class is cancelled by us
- Class is rescheduled by us
- You can cancel for refund 2 days (48hrs) before the Class
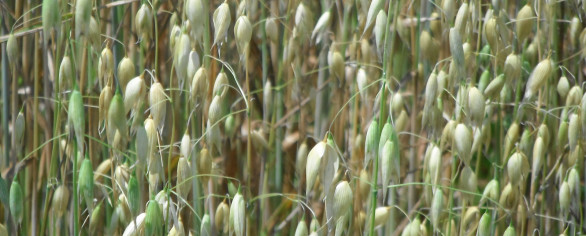
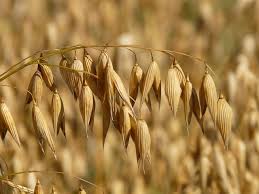
Oat groats are such extremely versatile little grains!
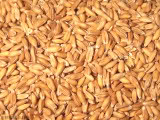
They can be milled by a grain mill (when still a whole grain) in to oat flour. Although not ideal for making use of in yeast breads as the single flour, the flour can be included as part of the required flour, yet oat flour can be utilized practically entirely as a substitute in various other baked goods not requiring yeast.
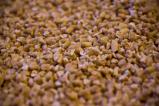
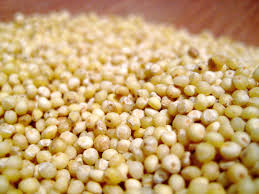
Oat Groats can likewise be utilized as Steel Cut Cereal (see picture at the right) and prepared as a thicker, chewier variation of oatmeal, included in a selection of warm dishes and baked/cooked goods.
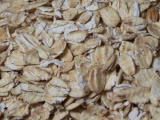
They can be rolled with a flaker turned into the old made rolled oats that the majority of individuals know them by. (pictured to the left)
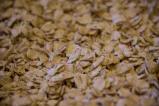
Once rolled, they can then be chopped into finer pieces using the food processor utilizing the S-blade and turned into healthy Quick Oats! See this video – http://www.youtube.com/thewheatguy#p/u/31/CR6En56LNUU
From one extremely versatile grain, you could make so very many different food staples. Such a great space saver for long term food storage space and a healthy and balanced option to fast fix foods with that contain harmful additives.

For more tips to how much variety this one grain (oats) can give you – you may enjoy this short radio show “Getting Grain Specific: Sewing some (wild) oats” – Just fast forward to about minute 10:00 because there were terrible technical difficulties… but there is still some good info! (: *embarrassed smile*
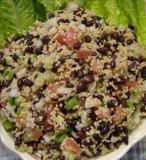
 This Gluten Free: Easy Millet & Veggie Salad is a great summer treat.
Commonly used in gluten free diets, I’ve found this grain is even more versatile when used whole rather than milled into flour. I like the simplicity of it and the texture. It rivals the texture of couscous (which is not a grain at all but a small durum wheat pasta) holding it’s form and shape well even after over cooking. It is an excellent option to replace rice and other whole grain side dishes.
For those warm summer nights and easy summer lunches, this recipe is both filling and cool to keep the kitchen from becoming a hot spot.
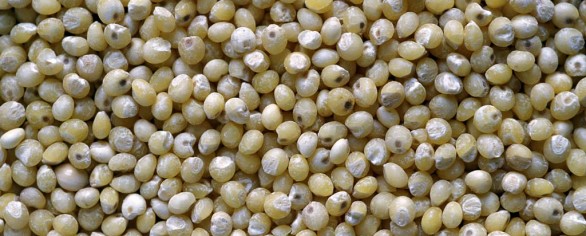
First be sure you are using food grade millet. Be sure it is fit for human consumption and not bird seed.
To cook basic, plain millet:
Rinse and drain 1 cup of millet. Set aside. In a medium saucepan, bring 2 1/2 cups water and the 1 cup millet to a boil. Cover, reduce heat to medium-low, and cook 15 minutes, much like rice until liquid absorbs. Remove from heat and let sit covered with a towel for 3-5 more minutes. This will be approximately 2.5 Cups in volume when done.
Once the millet is cooked and cooled, the opportunities for use are almost endless…
This easy recipe is my very favorite millet recipes used as a side, as a quick lunch or rolled in Nori as veggie sushi:
Millet and Veggie Salad
Ingredients:
1.5 Cups Cooked Organic Millet
1/4 Cup Cubed Cucumbers
1/4 Cup Diced Onions (red, scallions or white)
1/4 Cup Frozen Peas/Carrots
3 TBS Low fat Italian Dressing
Optional:
1/4 Cup cooked Organic Black Beans (pictured above – making this a complete meal with protein)
1/2 an Avocado Cubed*
1/4 Cup Cubed Tomato**
Mix all together in a large bowl or a container that can be covered and refrigerated for several hours. Overnight is best.
Serve chilled.
Lasts for almost a week in the fridge.
*Avocados added separately before serving, due to oxidation.
**Add Tomato separately upon serving due to easily spoiled.
FOR A SELF-SUSTAINING LIFE


