
 David Letterman may be retiring, but I’ve got my own “Top 10” to share with you. It’s a little more useful than it is funny, but I hope you enjoy it. To get the full effect, hear the little nuances, tips and tricks plus enjoy the tongue-in-cheek approach I tried in order to make frugality a bit more entertaining, you’ll want to click the audio bar under that radio pictured to the left and listen to a recent show of mine (Surviving On Shoestrings on the Survival Mom Radio Network).
To follow along and get a hint of what I break down in the show, here is a basic list of my “Top 10 Frugal Tips & Thrifty Kitchen Habits“:
- #10 – Get Organized.
- #9 – Do a Weekly Purge.
- #8 – Grow Something (Garden)
- #7 – Cook from Scratch.
- #6 – Make your Own Condiments and….
- #5 – Portion Control from the Beginning
- #4 – Pack Snacks & Lunches…
- #3 – Shop Sales & Use Coupons Wisely…
- #2 – Plan a Weekly Menu…based on….
- #1 – Buy Extra & Buy Bulk!
Now if you listened all the way through, you know that the list is only the framework, the tips and ideas and ways of looking at our kitchen habits differently are what can help encourage you
Bonus contest!
Leave a comment and answer: How many times did I say the odd phrase: …. “Not to mention….” ?
The first one to get it right…I’ll send you a copy of my first e-book: Supreme Bread Machine Cookbook
Who knew that I said that many times…? It got kind of annoying…now that’s a new habit that I need to break!
Best Blessings and enJOY the Journey!
~ Donna Miller
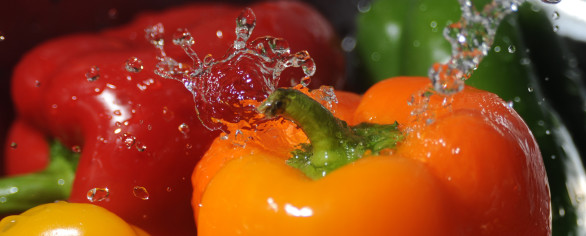
Maybe it’s not quite time for those special summer treats to come out of the garden, but it’s never too soon to practice how to prolong the harvest! But bell peppers (red, yellow, orange or green) are so expensive out of season! And what if a recipe only calls for a portion of a bell pepper? Then what do you do? Throw the rest away? No. But freezing them turns them to mush (and sometimes can make the freezer smell a little peppered). The answer is to dehydrate them. It is so easy and takes almost no time at all.
 Although I like bell peppers just fine , they can become overpowering, so even when they are in season, I tend to use only about 1/4-1/2 of what ‘s called for in a recipe. Leaving me again with a surplus of these easy to grow summer veggies.
But out-of-season produce is always far too rich for my blood. So….
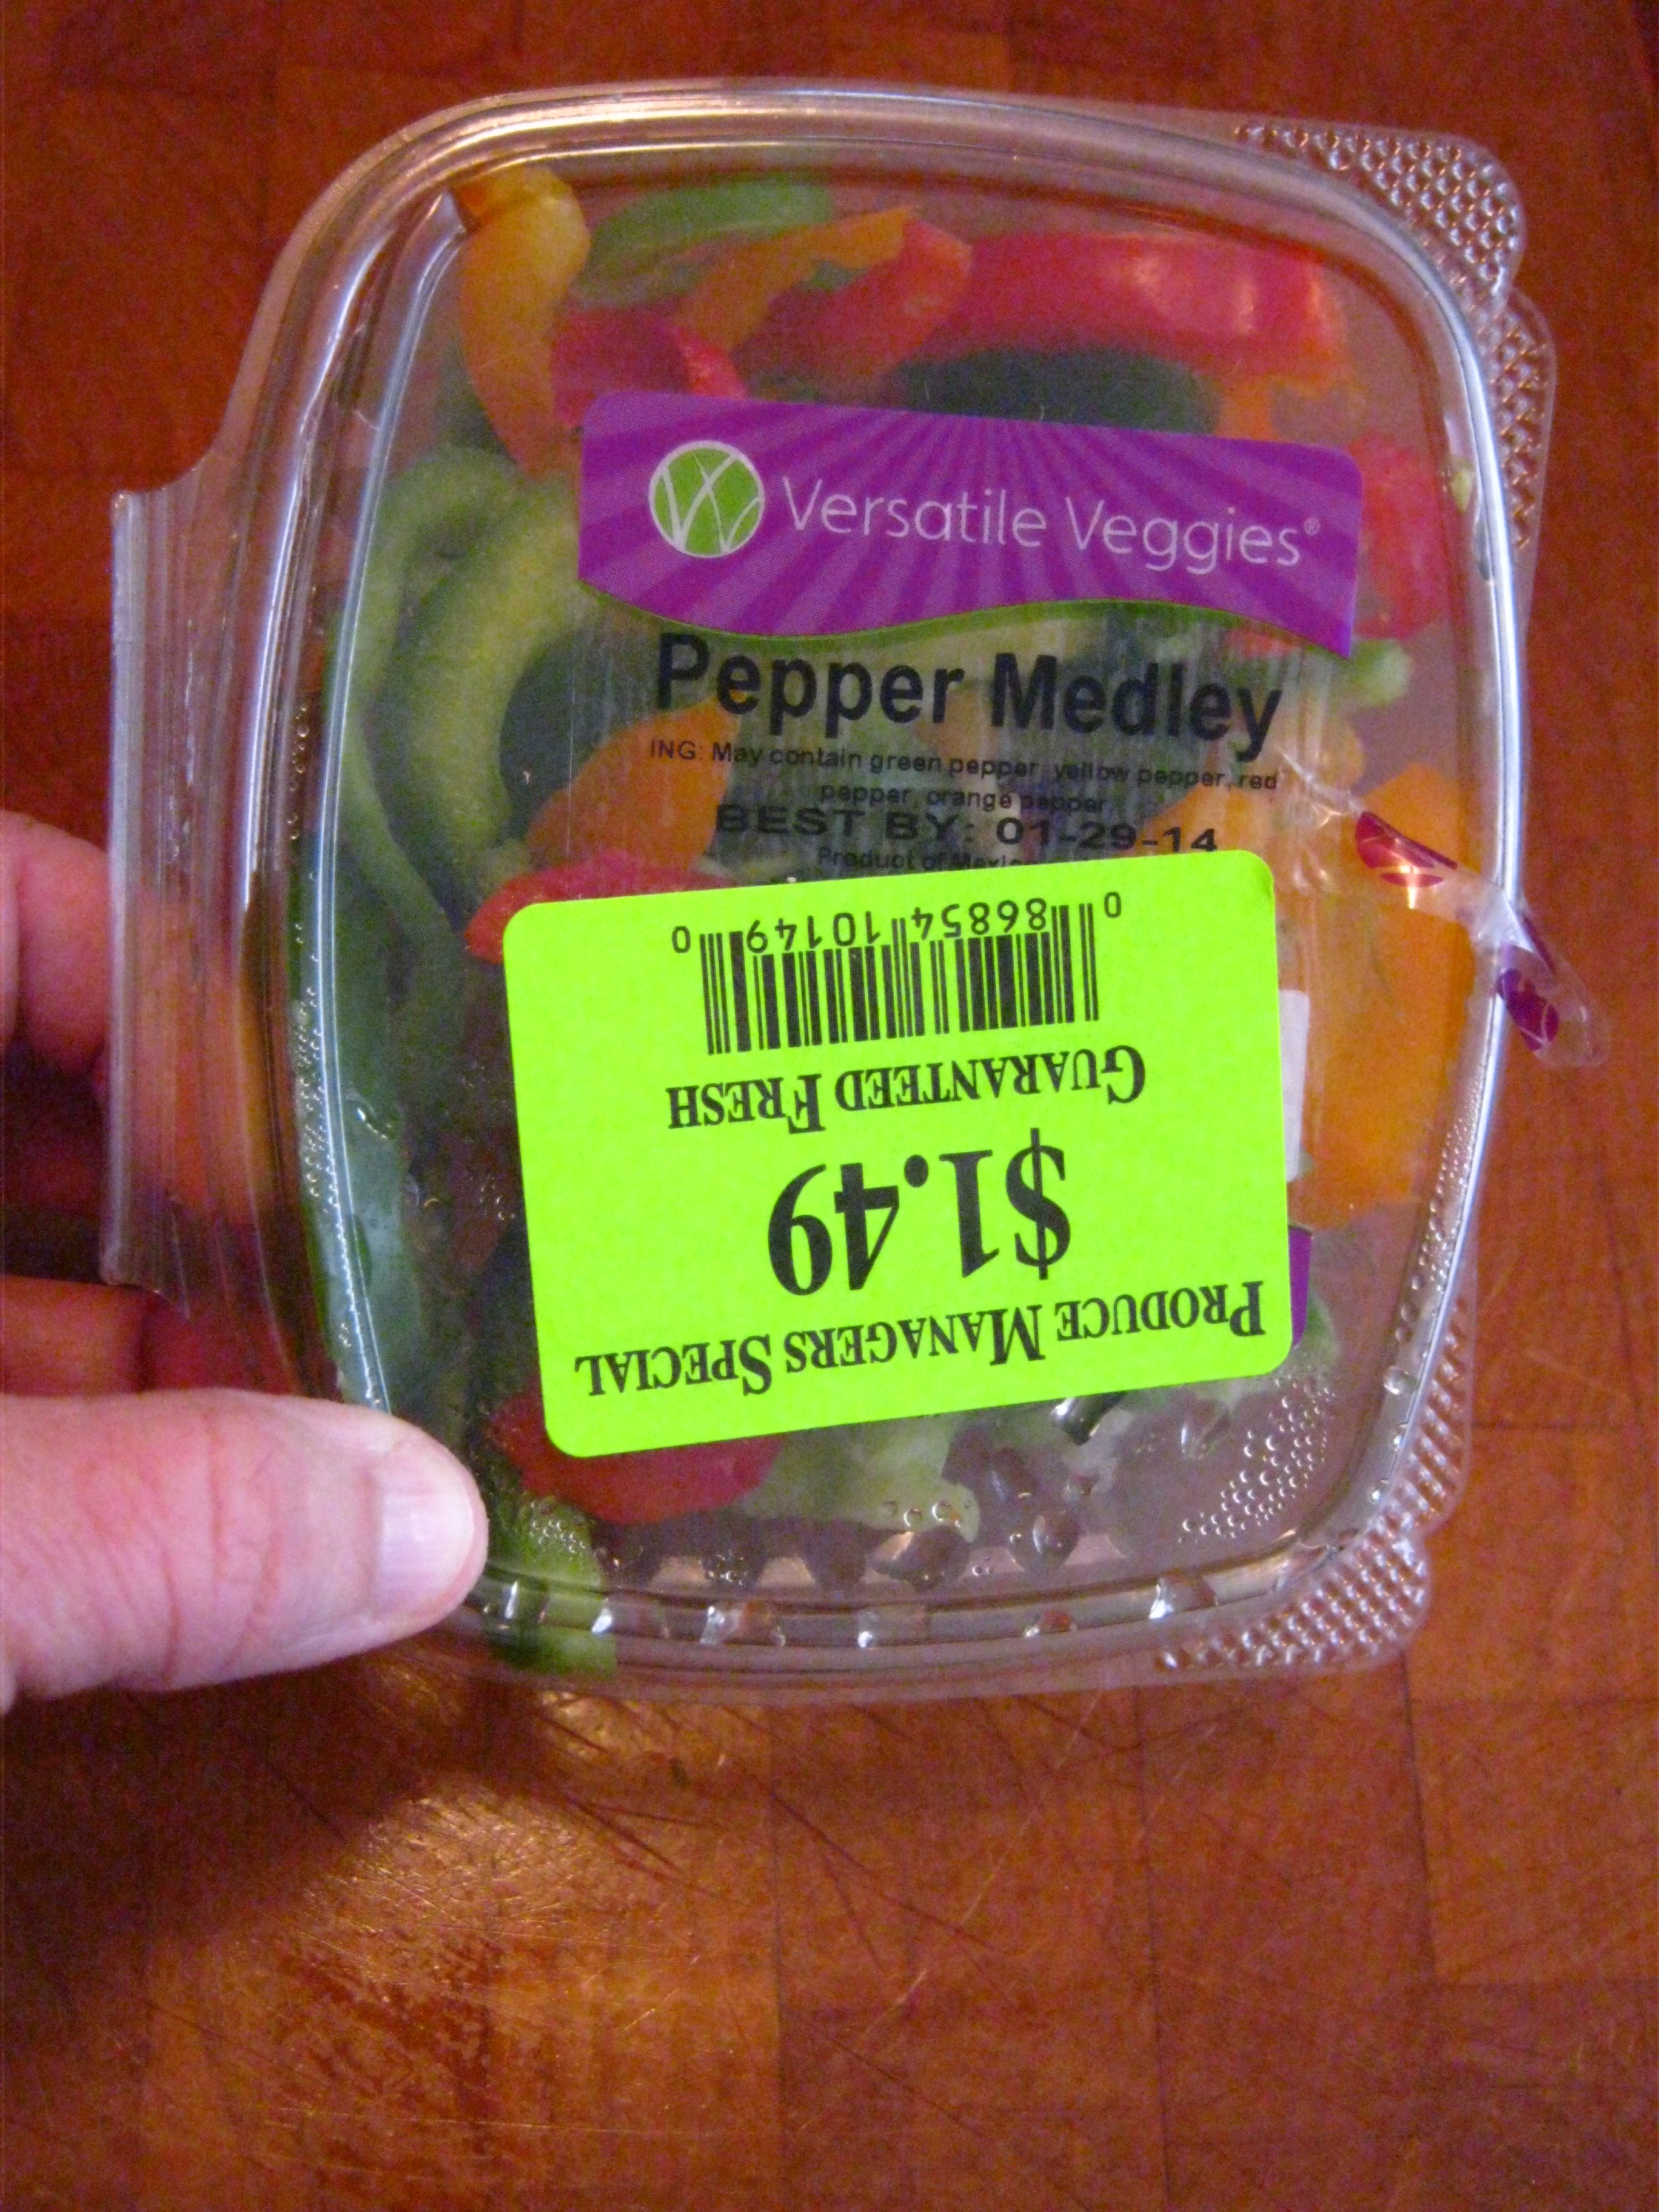
Enter my ‘out-of-season-go-to plan’ for most produce. When produce is in the grocer and it is not the season for harvest in your area, it’s getting trucked in and was picked “a long time ago, in a galaxy far far away”. This is one of the reasons you pay a premium price on produce out of season. But if you look for the pre-cut items that are marked down from their usually higher price tag (this one pictured usually runs $3.48 for the half pint) you can save a step and a buck or two at the same time.
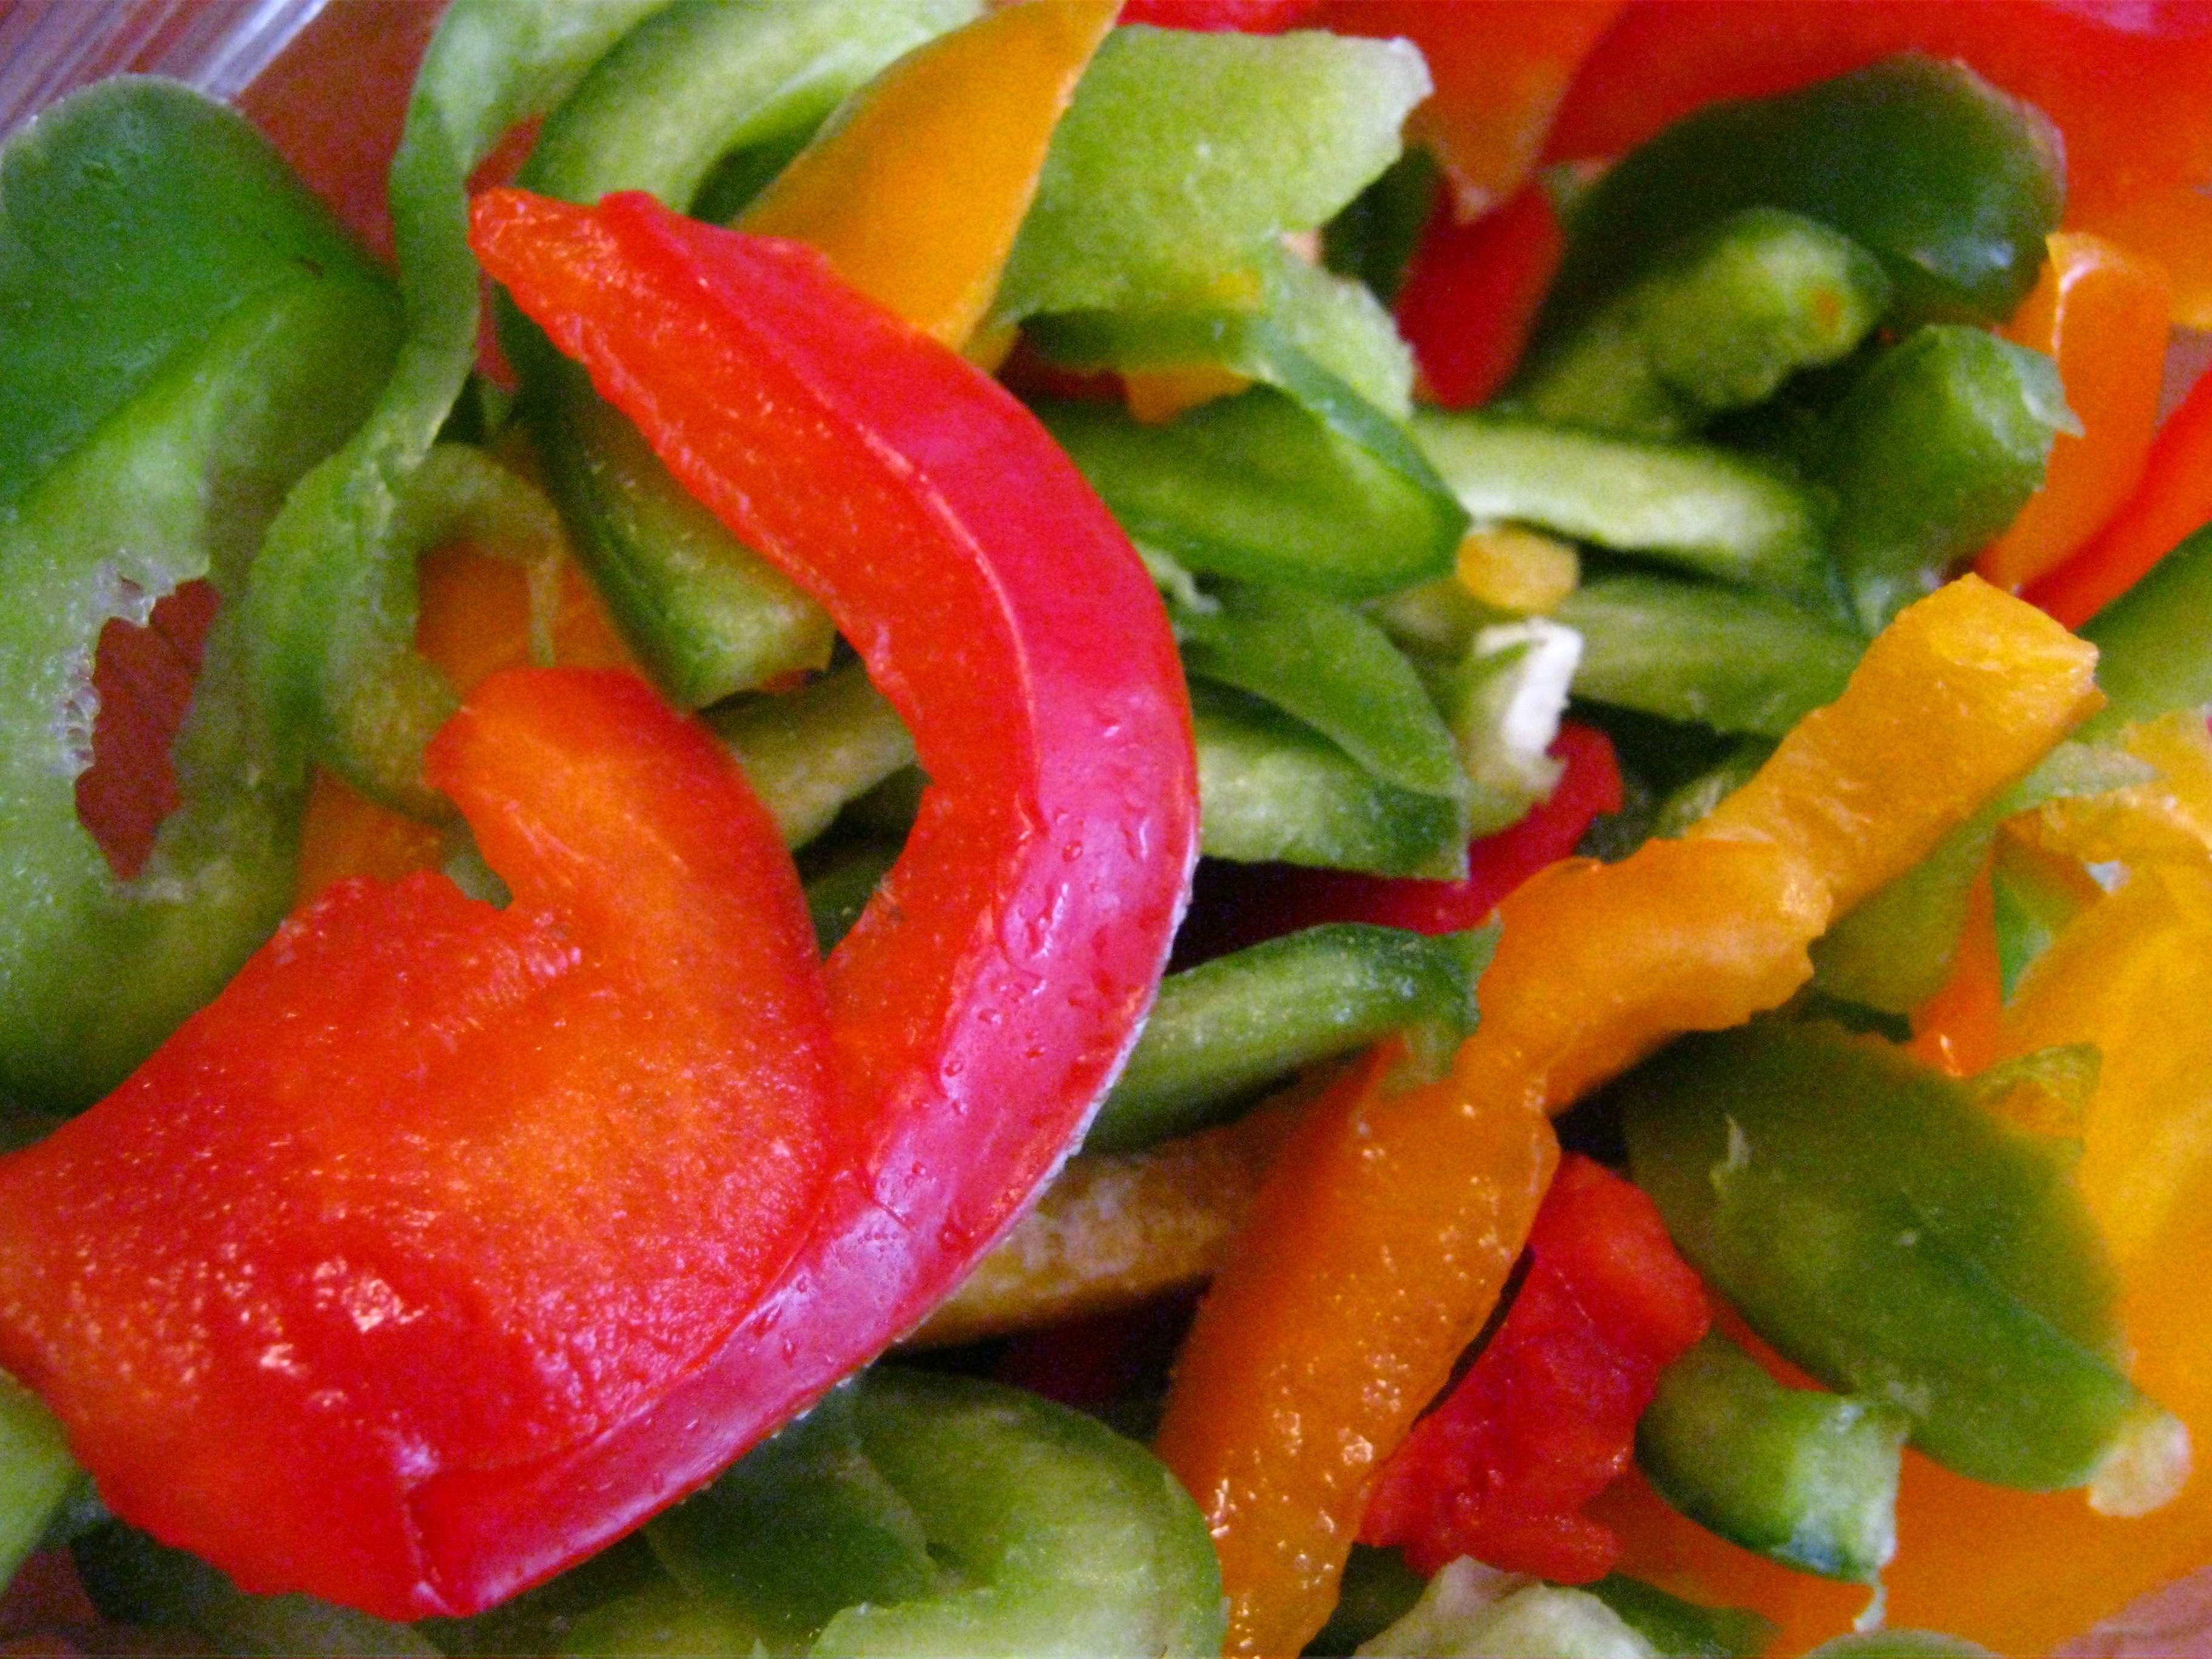 I bring them home and rinse and check them in a colander. They are, after all marked down, I want to be sure that there’s nothing funky hiding in the midst.
Since these are already sliced, like most packaged produce, in uniform widths, they are primed and ready to dehydrate with ease.
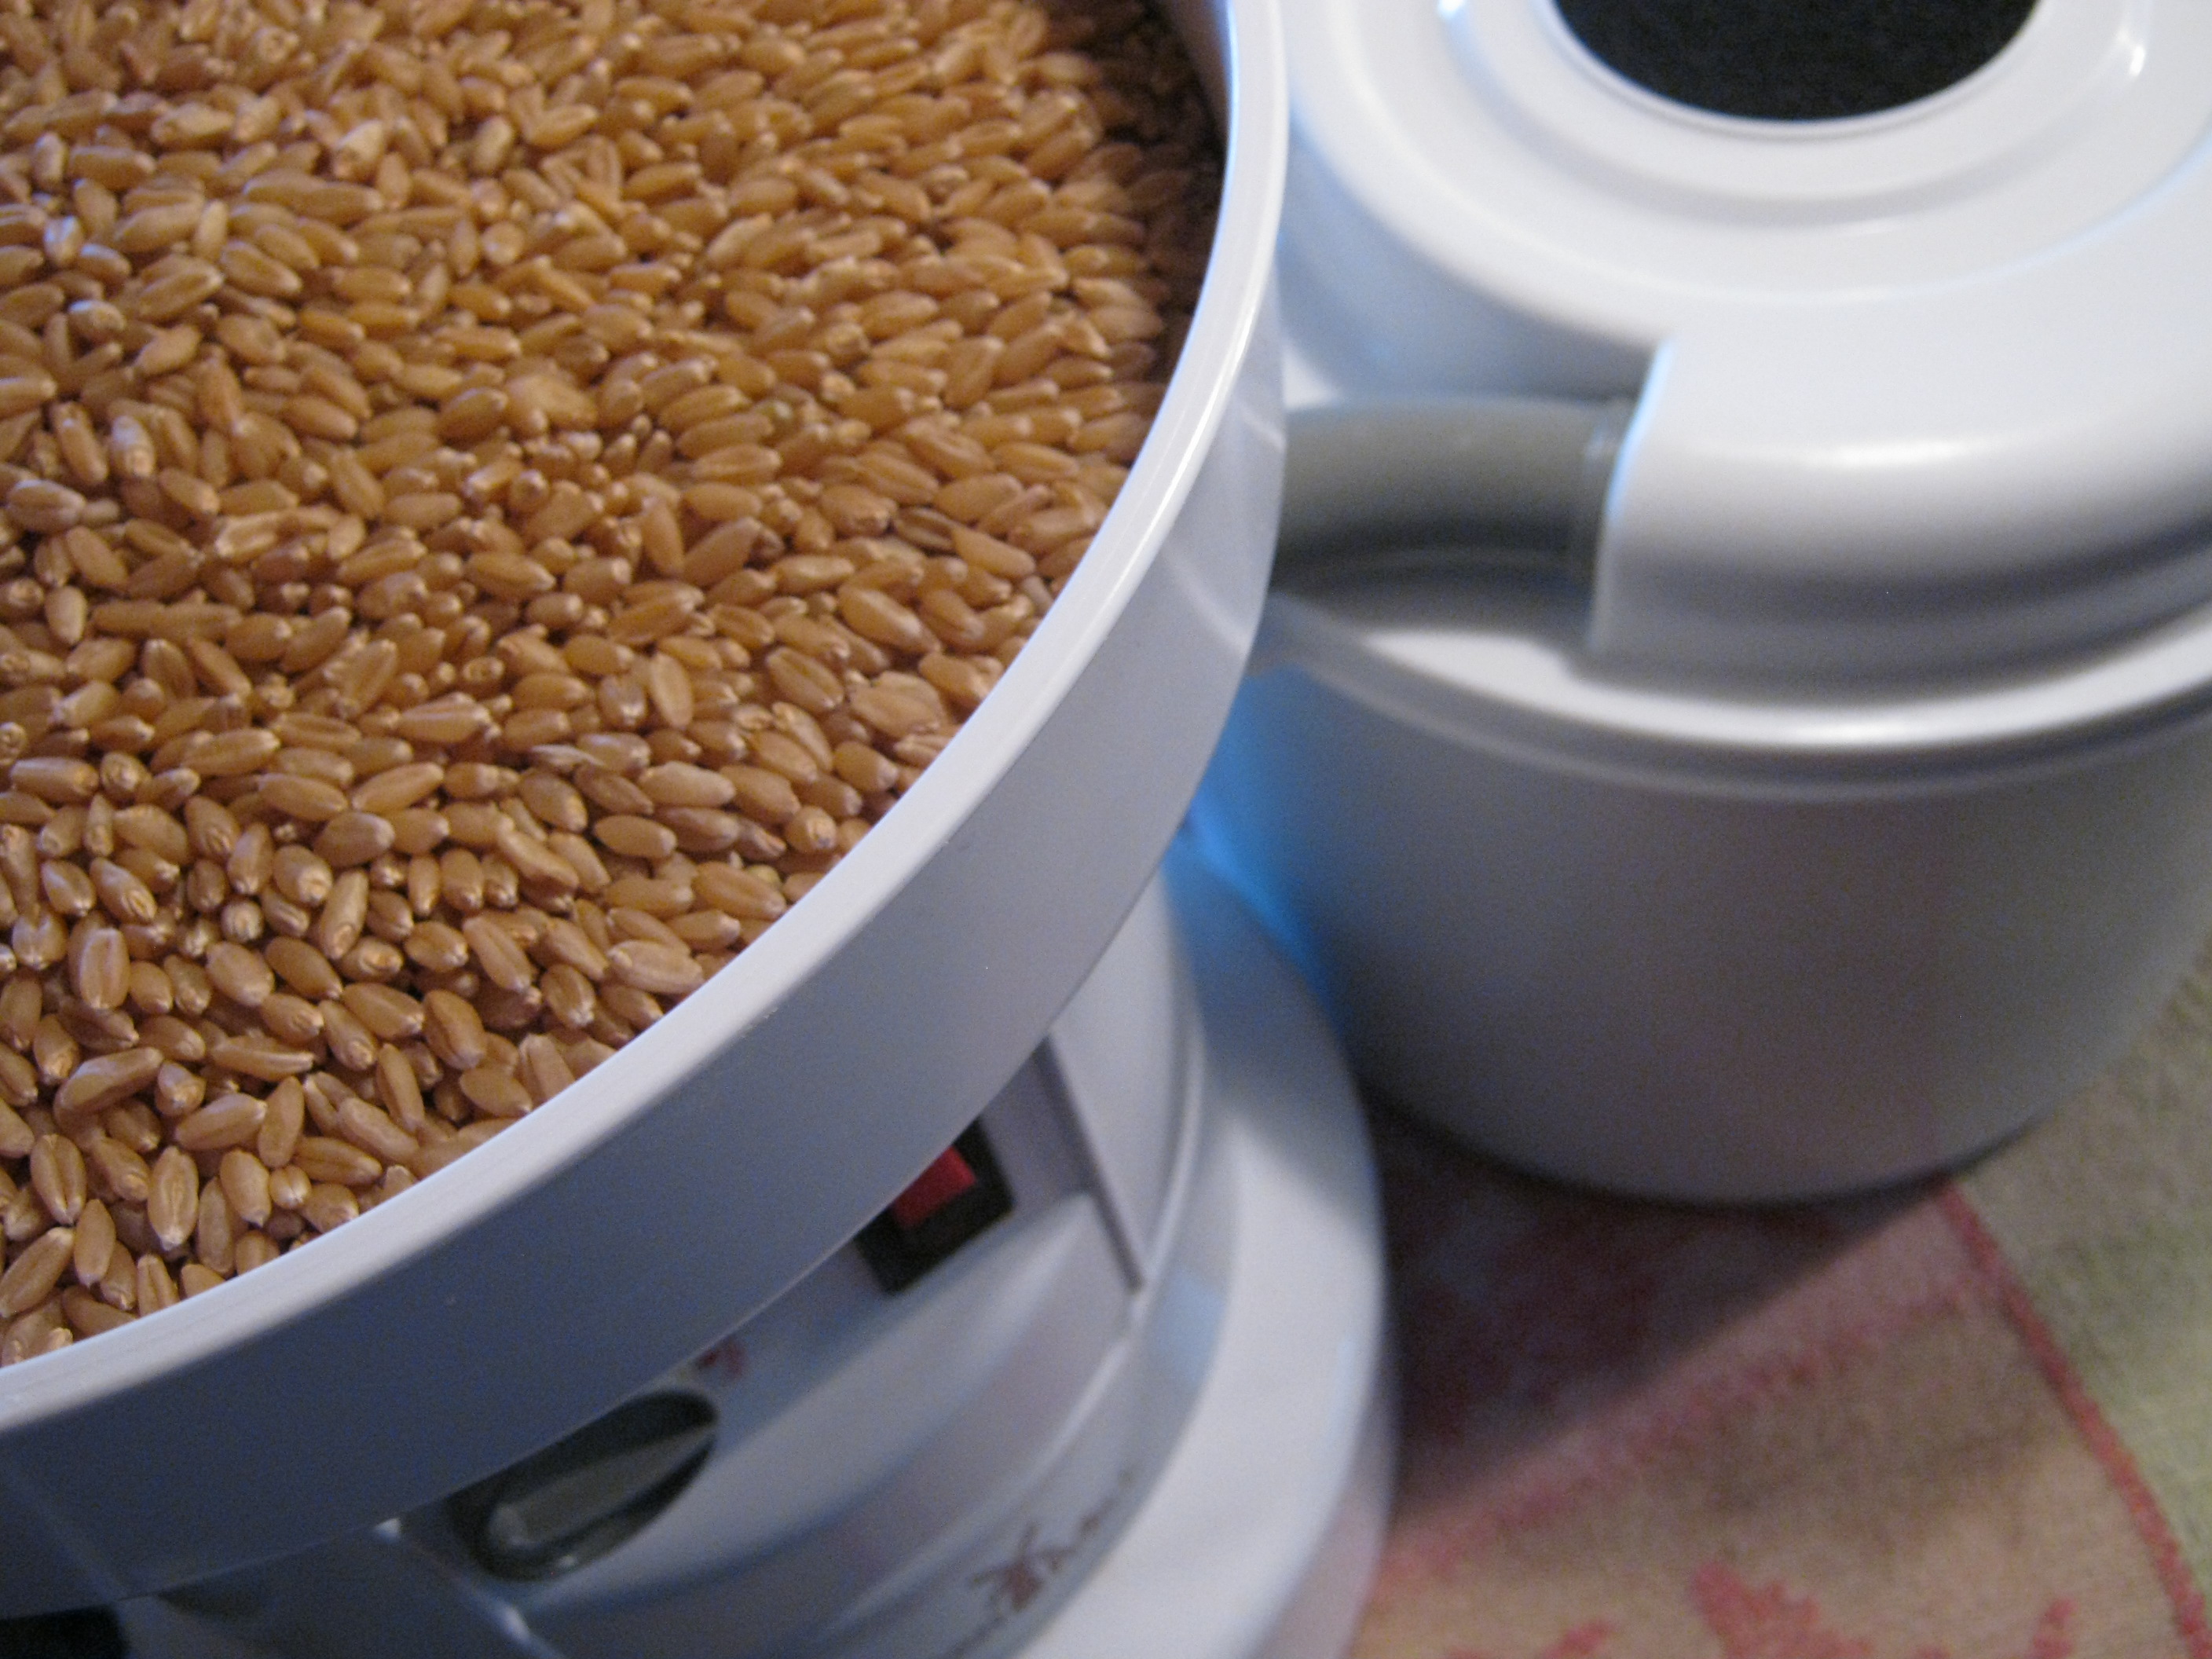
I let them drain for just a few minutes while pulling out my Excalibur 9 Tray Economy Dehydrator. I have to admit – that this one appliance has not only paid for itself by putting back items from the garden, but has helped me by prolonging the life of produce that was on sale and keep from throwing out food that has been in the refrigerator a while. 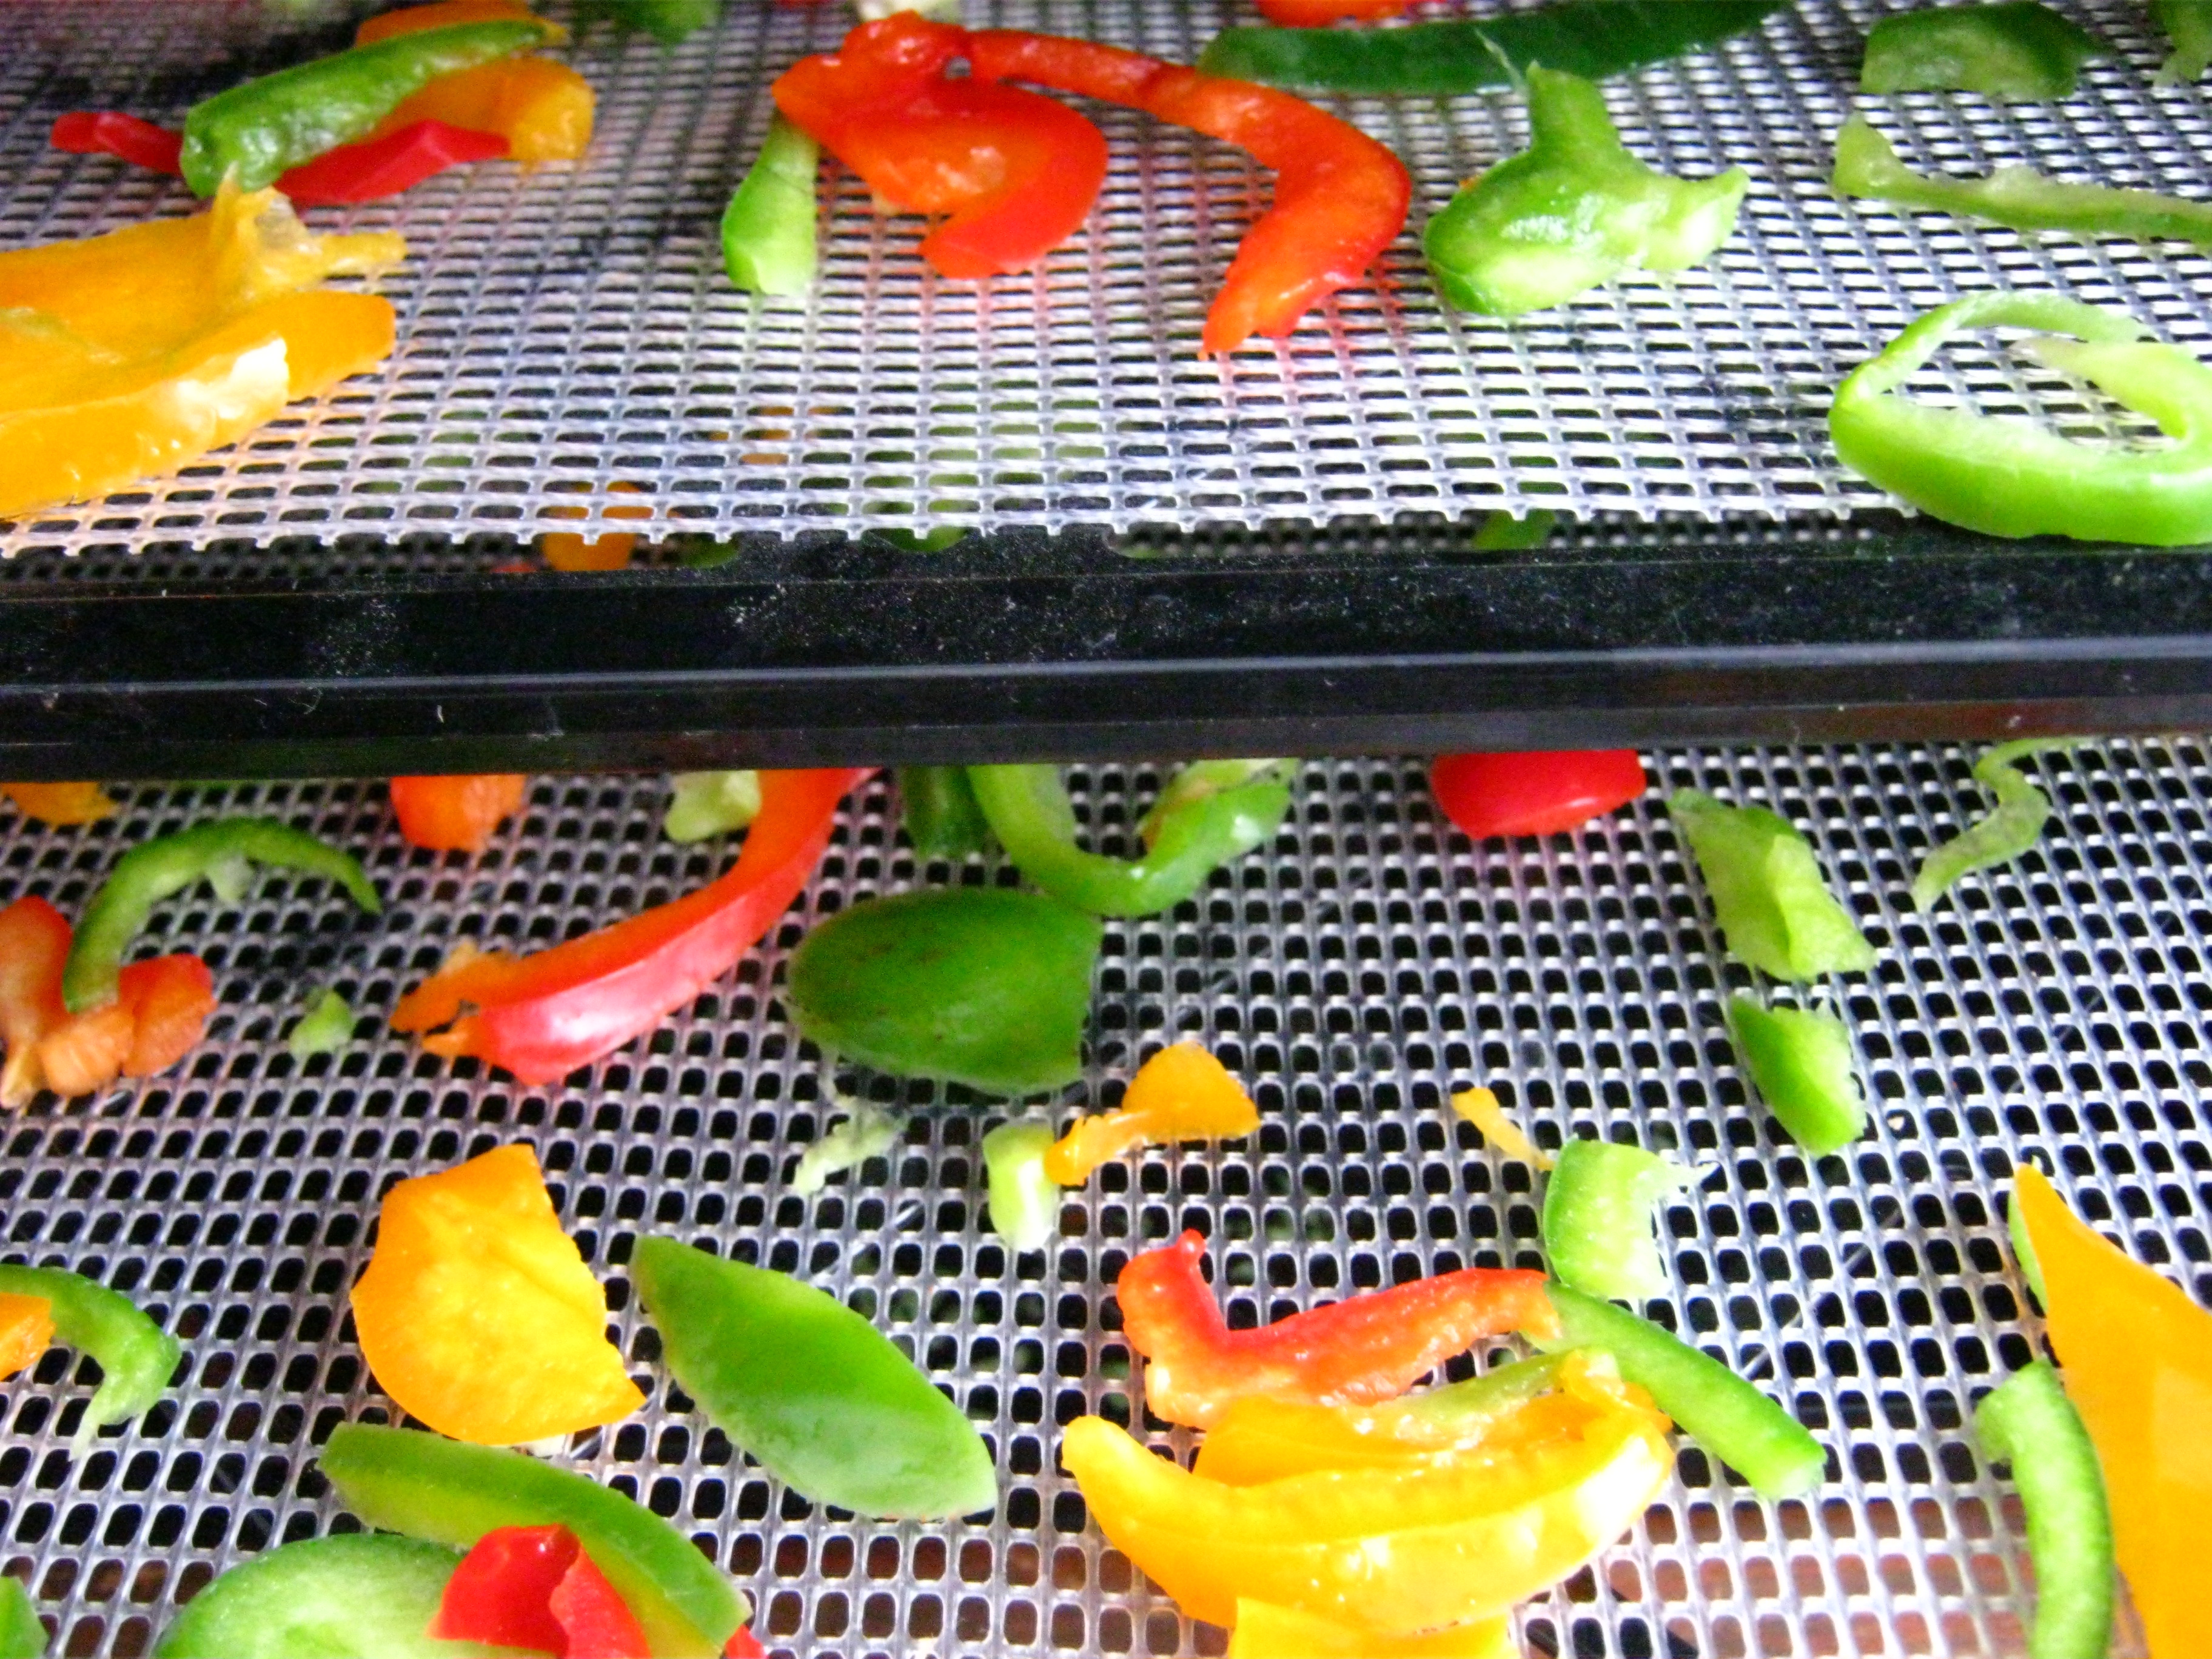
Bounce of any clinging water from the colander and pour out on to the dehydrator tray. There may be a need for multiple trays depending upon how big of a stash you were able to snag at the grocer when they were marked down. Just spread these beauties out equally and give them some breathing room!
Now, if you want them to remain a LIVE food…dehydrate them below 115 degrees F. The enzymes will stay live (not the bacteria but the enzymes that help with digestion) and just keep drying until desired dryness is achieved. This may take up to 24hrs.
However, if you’re going to put these into recipes later, or chop up little bits for meatloaf or sauces…crank them on up to 130 and you’ll be done faster! Likely you’ll have dry peppers ready for storage wtihin 8 hours. So it’s an ideal over night project.
Remember the Excalibur 9 Tray Economy Dehydrator costs about 1 penny per hour (often less) of electricity to use. So either choice you make for drying purposes does not really cost you that much more to prolong the produce you dry.
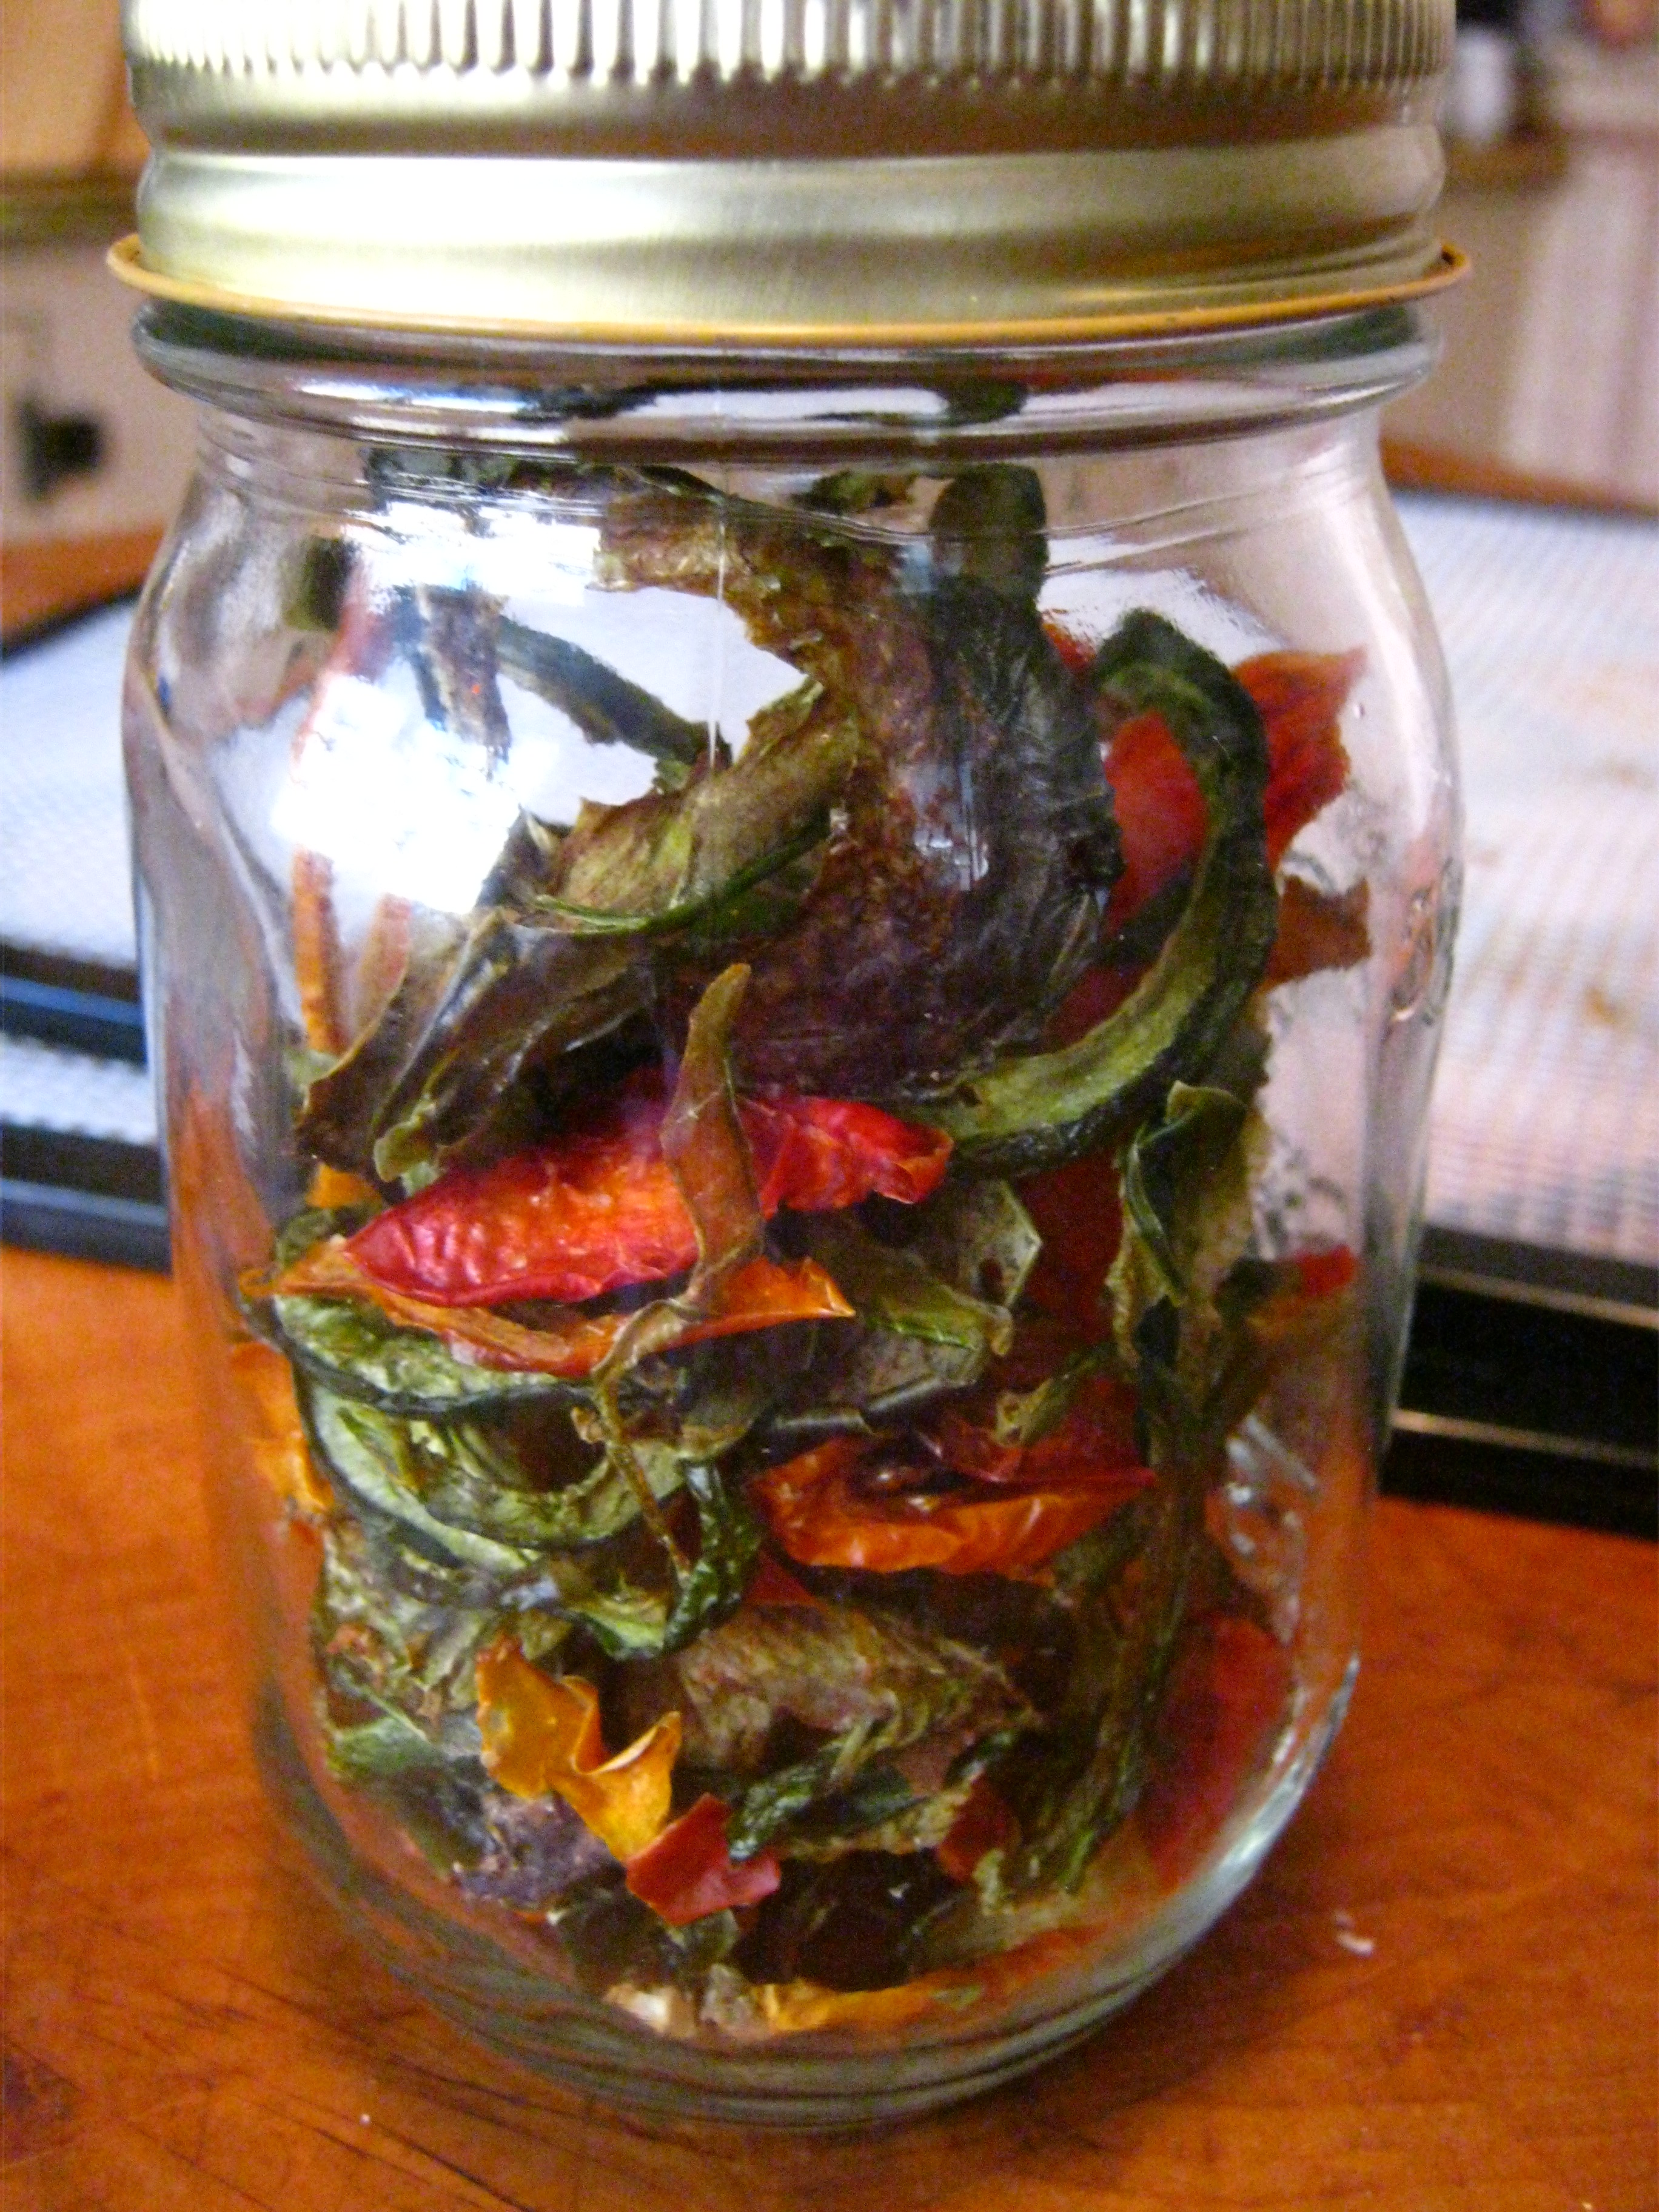
As soon as they are dry to your liking (hint: they dryer they feel the longer they will last) let them cool to room temperature and place in a jar or other air tight container. They must be cooled to avoid sweating, but also cannot be left out too long to pick up any moisture from the air. Inside the container place a desiccant packet. Especially if you’re going to use these over the next few months, the desiccant packet will be fine enough. There is no need for an oxygen absorber unless you plan to ignore this food indefinitely. If you have a food-saver you can remove air with the jar sealer attachment to remove more air in between the times you open and close the jar to use your pretty little peppers (or whatever produce you’ve dehydrated). The desiccant packet removes any moisture thus keeping the food dryer longer. Just be SURE when you purchase or use desiccant packets that they are marked clearly for Food Grade Use like the ones we have selected as examples below.
I hope that you’ll use some of these tips on more than just the bell pepper and try to prolong produce of many kinds. Until next time, keep playing with your food and enJOY the journey!
Best Blessings, Donna
In full disclosure, yes we do make our living from the sale of items (which we also use personally and can in good faith recommend) such as these desiccant packets and the Excalibur Dehydrator. If you like what we share with you, please consider purchasing your needs with us at Millers Grain House. We promise to treat you like family. (:

Easily enter below for a chance to win this helpful eBook!
Why feed your family processed, dead and tasteless grocery store bread (that has little to no nutritional value and that is often loaded with unhealthy chemicals and preservatives) when you can easily make your own healthy, whole wheat bread from home for a fraction of the cost?
- Maybe you think home-made wheat bread is too heavy and dense?
- Maybe you think it’s bitter and doesn’t taste good?
- Maybe you think it’s too difficult to do or that your family won’t like it?
Let this ebook show you how that list above is totally wrong! You can do it, it will taste great and your family will love it (and be healthier too). Here’s a peek inside:

Hopefully you can see how I’ve broken down the steps and techniques and you’re interested in learning more. But for a while…there’s an extra perk!
- Enter below through December 10th and you could WIN it this eBook !
But if you don’t win – you can pick up a copy of the Whole Wheat Bread Making eBook or there is a Paperback version if you prefer the real deal in at your finger tips.
Best of success to you in the giveaway and the kitchen!
Donna Miller

 Sorry. Nope. Turkey doesn’t count – it’s too cliche’.
We all have too much of that left over after Thanksgiving, but it is often a planned left-over food. We know it’s going to happen and we have a plan or two for what to do with all that extra turkey. Even if we get sick of it, we have plans.
What I want to know is:
- What other food ends up as a surplus at your home after Thanksgiving?
- What do you have in abundance that you really don’t know what else to do with other than to reheat it…again and again and again?
- What will you have that you’re likely going to throw out if you can’t stand it anymore in it’s current form?
We want to help you save money and your sanity, but we need to know where you need the help.
So if it’s a side dish, a dessert, gravy or anything other than turkey that graces your table at Thanksgiving still lingers far too long after the guests and holiday are gone – we want to know about it!
We want to help you address the mountain of mashed potatoes, or the cranberry sauce that seem to take up residence in your refrigerator and spill, hide and eventually grow off-spring long after the Thanksgiving holiday has run it’s course.
Please take the quick survey below …
Then in the days following Thanksgiving, come back here for some ideas on how to turn your left-over items into completely different foods. Better yet, sign up for the newsletter and we’ll send you a note when the recipes are up.
You don’t have to face a kitchen full of the same old same old same repeated stuff that gets nuked and reheated to oblivion. It can all get used! We’re here to help! But we need your help first. Please take this short survey! Thank you!
Best Blessings for a Peaceful Thanksgiving!
Donna
Create your free online surveys with SurveyMonkey , the world’s leading questionnaire tool.

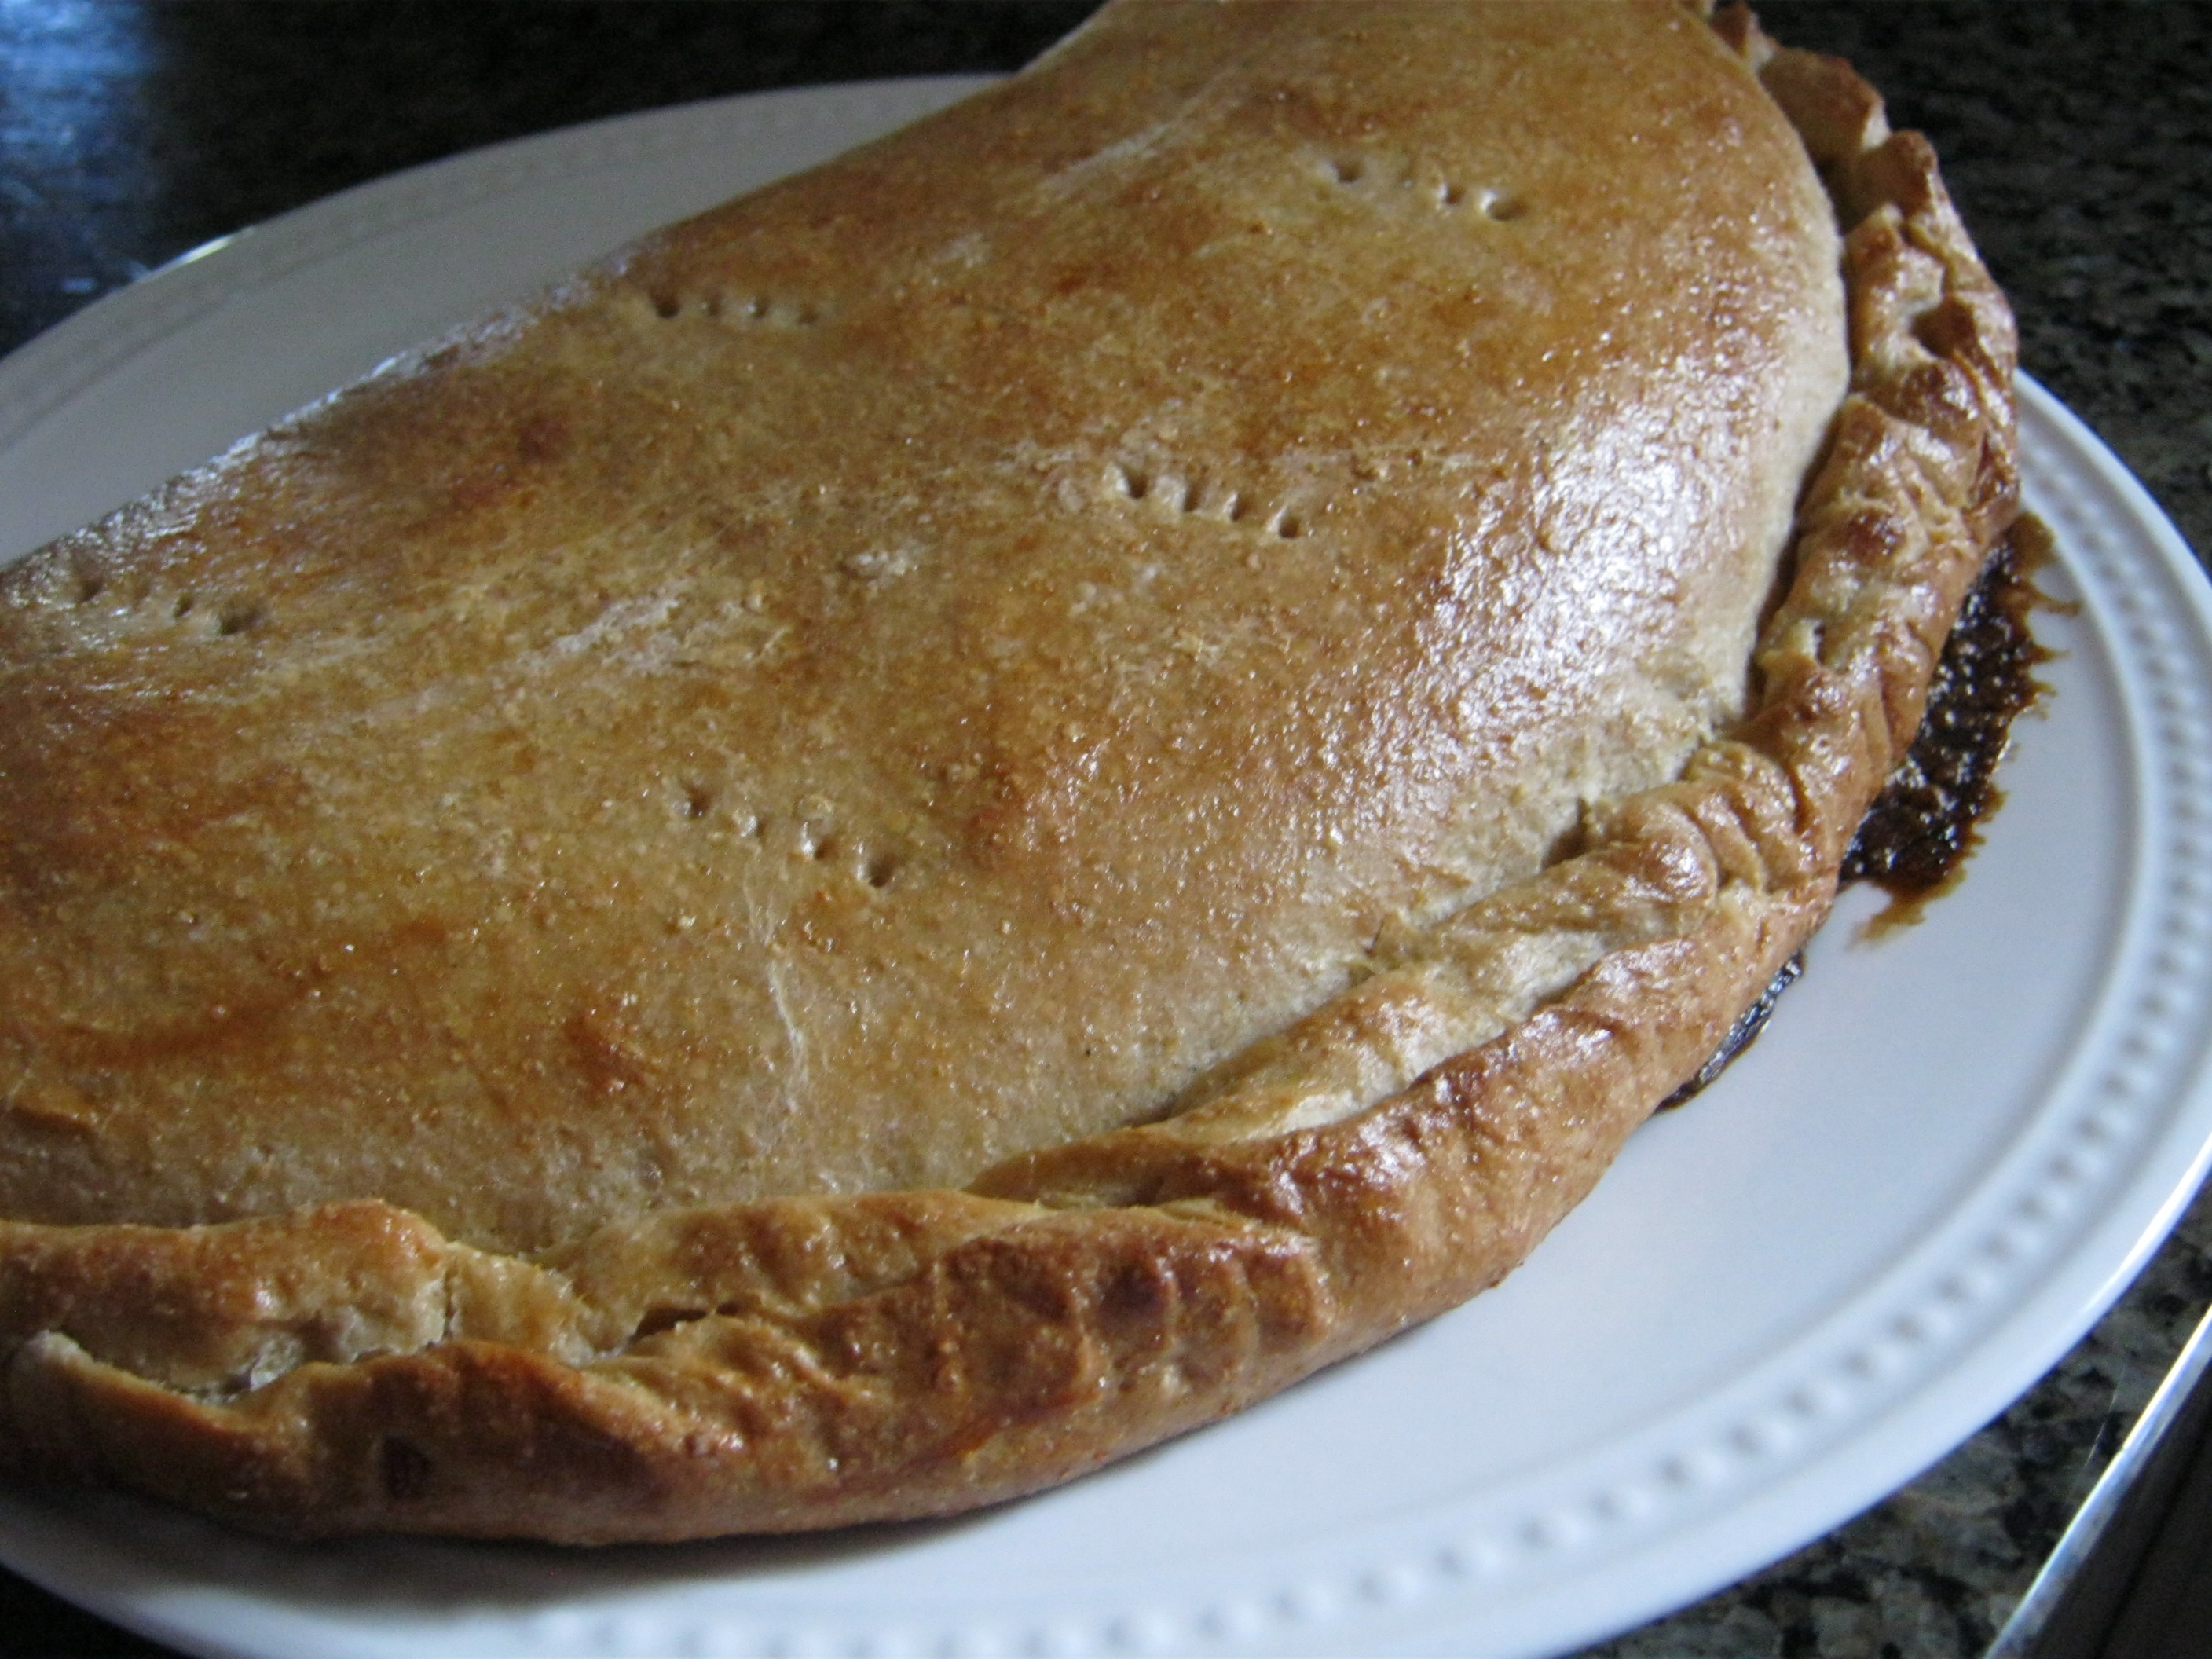
If you can make a pizza crust -you can easily use the crust to make a calzone to change up the typical pizza and still enjoy an easy whole grain Italian meal!
Whole Wheat Calzones
Whole Wheat Pizza Crusts
Makes two 16 inch pizza crusts
Ingredients:
- 1 ½ Cups Warm Water
- 4 TBS Organic Evaporated Cane Crystals
- 2 TBS Olive Oil
- 4 Cups Freshly Milled Hard Wheat Flour
- 1 tsp Garlic Salt
- ½ tsp Onion Salt
- 1 ½ tsp Instant Active Yeast
Bread Machine Method:
Place all ingredients in the machine in order given. Make a ‘well’ for the yeast and put in the ‘well’. Set to dough or pizza dough setting. Machine should punch down after first rise.
Food Processor Method:
Use ‘S’ Blade. Place all dry ingredients in the food processor. Turn to pulsing while drizzling in the oil. Stop when mixed in. Now turn on and leave on drizzling in the water until dough forms a ‘ball’. Let ‘ball’ clean the sides and round the bowl between 20-25 times.
Place in greased bowl, cover and put in a warm place (85 degrees) until doubled in size.
Mixer & Hand Methods:
Mix yeast in with the flour and set aside. Mix all other ingredients in a large bowl until blended. Mix one cup of flour mixture in at a time until all incorporated. Knead 3-5 minutes until 2 finger poke test bounces back quickly.
Place in greased bowl, cover and put in a warm place (85 degrees) until doubled in size.
Forming:
 Divide dough in to 2 (for large) or 4 (for small) balls of dough. Roll each out on to a floured surface and fill the center with a combination of cheeses: Ricotta, Mozzarella, Provolone and extra goodies such as mushrooms, peppers, pepperonis, cooked ground sausage (we like turkey sausage), onions (go light they get watery) and more. The possibilities are almost endless.
Fold one side over the other (stuffing in the middle will move) and turn up the edges and seal with a fork. Prick a few holes in the top for steam to escape.
Place on a cookie sheet or pyrex dish and brush a light egg wash.
Baking:
Bake at 375F until golden brown. Remove to cool for just a little bit so no one gets burned cutting into the gooey goodies inside the tasty pockets!
For more fun ideas in the kitchen, subscribe to Millers Grain House YouTube Channel
Also, come join us on:
For more off the cuff ideas, coupon codes for discounts and impromptu recipes!
Best Blessings and enJOY the journey!
Donna
If you can make a pizza crust -you can easily use the crust to make a calzone and put a twist on an Italian meal!
Whole Wheat Pizza Crusts
Makes two 16 inch pizza crusts
Ingredients:
- 1 ½ Cups Warm Water
- 4 TBS Organic Evaporated Cane Crystals
- 2 TBS Olive Oil
- 4 Cups Freshly Milled Hard Wheat Flour
- 1 tsp Garlic Salt
- ½ tsp Onion Salt
- 1 ½ tsp Instant Active Yeast
Bread Machine Method:
Place all ingredients in the machine in order given. Make a ‘well’ for the yeast and put in the ‘well’. Set to dough or pizza dough setting. Machine should punch down after first rise.
Food Processor Method:
Use ‘S’ Blade. Place all dry ingredients in the food processor. Turn to pulsing while drizzling in the oil. Stop when mixed in. Now turn on and leave on drizzling in the water until dough forms a ‘ball’. Let ‘ball’ clean the sides and round the bowl between 20-25 times.
Place in greased bowl, cover and put in a warm place (85 degrees) until doubled in size.
Mixer & Hand Methods:
Mix yeast in with the flour and set aside. Mix all other ingredients in a large bowl until blended. Mix one cup of flour mixture in at a time until all incorporated. Knead 3-5 minutes until 2 finger poke test bounces back quickly.
Place in greased bowl, cover and put in a warm place (85 degrees) until doubled in size.
Forming:
Divide dough in to 2 (for large) or 4 (for small) balls of dough. Roll each out on to a floured surface and fill the center with a combination of cheeses: Ricotta, Mozzarella, Provolone and extra goodies such as mushrooms, peppers, pepperonis, cooked ground sausage (we like turkey sausage), onions (go light they get watery) and more. The possibilities are almost endless.
Fold one side over the other (stuffing in the middle will move) and turn up the edges and seal with a fork. Prick a few holes in the top for steam to escape.
Place on a cookie sheet or pyrex dish and brush a light egg wash.
Forming:
Bake at 375F until golden brown. Remove to cool for just a little bit so no one gets burned cutting into the gooey goodies inside the tasty pockets!
– See more at: http://bakingwholegrains.com/whole-wheat-calzones/#sthash.N6k2gbUA.dpuf
Okay, I say the description of ‘great’ …and then I feel like an egomaniac since they’re my books…but I have had a lot of folks say they really like them so I’m just going off of their feedback when I say ‘great’. Please don’t think I’m tooting my own horn :/
I enjoyed writing them, testing the recipes and making sure I could convey exactly what I would if you were right here in 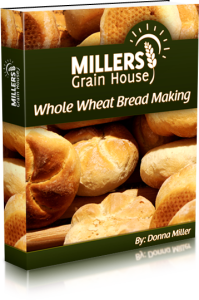 the kitchen with me. So, it is my hope that they are something you will enjoy too.
The two e-books are my “Supreme Bread Making with Bagel  Video” and my newest “Whole Wheat Bread Making“. By clicking those links you’ll see what is in each e-book.
BUT… this post is more than showing you these to e-books…I want to give them to you if you win!
You can enter this Giveaway to have a chance to win BOTH!
Take a look at how it’s set up. You don’t HAVE TO do them all…but the more you do, the more points you rack up toward extra entries in the Giveaway! So…it’s up to you how many points toward wining you will want.
The Giveaway contest ends this Friday!

If you share the desire with me to slow down, and intentionally get back to basics, you’ll want to read this. I hear from so many people who want to simplify but don’t know where to start or feel overwhelmed because they feel like they lack skills to accomplish it. If that’s you….do not despair. Read on.
 In our extremely hectic world society has put much pressure on each member of it to ‘succeed’ and often at any cost. What is the real cost? Much of the time it’s to the detriment of our health, our family relationships and our peace of mind.
I stand just as guilty of frequently falling into the trap or being lured by what appears to be ‘success’ (be it defined by money, accolades, popularity or material possessions, etc) only to find much of it is not only empty but also fleeting and fickle. Most of the time, peace, for me can be found by intentionally sorting through the vast and ever pressing modern opportunities and getting back to the basics of simply living.
It’s a joke in some ways, but reality in others, that I often head to the kitchen to make bread because “I knead therapy.” No, that was not a typo-o. I do KNEAD that bread making rythm and feel of the therapeutic dough, the smell as it bakes (there is science behind the smell of fresh baked bread releasing stress) and of course the taste of home-made ANYTHING is always a deeper sense of satisfaction than packaged or convenience foods.
My suggestion is – sit quietly and find out where you’re overwhelmed. Try to find ways to pare down the ‘to do’ list that drains you and put in some things that recharge you!
Here is a tool that may help you see some of the joys in simplicity. It is only available for a limited time (5 days as of this posting) but is PACKED with advice and instructions from leaders in the area of self-sufficiency, homesteading, home-making, gardening and loads of back to basics skills. Click the banner to take a look and see all the topics!

Until next time …enJOY the journey!
Donna
With the rise in so many people being diagnosed as “Gluten Intolerant” or having a “Gluten Sensitive” it’s no wonder that this naturally occurring protein has gotten an undeserved bad name. Unless the diagnosis is actually “Celiac’s Disease” – you may just be one of the numerous people who are affected by our highly processed flour and diet and may not actually suffer from a true intolerance or sensitivity to gluten. I truly believe, and can attest to it personally for myself, that it is not gluten that is the problem for most people. It is the processing of flour to make it so-called “shelf worthy” that is a big problem.
The truth is that gluten is present in many grains, mostly however, wheat is the most widely used and recognized. Gluten was not ever meant to be consumed without the benefits of the entire grain – which you cannot get in a bag of dead store bough flour…even ‘whole’ wheat flour. Mostly because it isn’t the whole wheat kernel…although it may be allowed to labeled that way.
 The wheat grain was created to work like all whole foods – with a synergistic relationship one part to another, with each part in tact. When a wheat grain is stripped down to make white flour all but the endosperm is discarded and we are left with the white flour that can hold together a paper mache’ creations – of course then gluten becomes an issue – where are the parts that help us to digest this ‘glue’? They are missing. Even in ‘whole wheat’ flour the wheat germ oil mostly is removed to prolong shelf life. Traces of it are left and the rancidity of the traces of oil is what cause the bitter taste in bagged ‘whole wheat’ flour. No wonder no one seems to think they can like whole wheat – they taste the rancid oil left in the bagged dead flour.
So there are two problems – just to name a a few that help to feed (no pun intended) this frenzy of gluten being a problem. It in fact is a fraction of a whole that was meant to work together in our digestive system.
Now let us just take a quick look at what is missing nutritionally when we consume only the white dead bagged flour.
It’s called ‘enriched’ flour for a reason. It has been ‘enriched’ with synthetic (yes, think – fake) vitamins and minerals to attempt to replace what has been removed when the other parts of the kernel have been omitted from your flour. 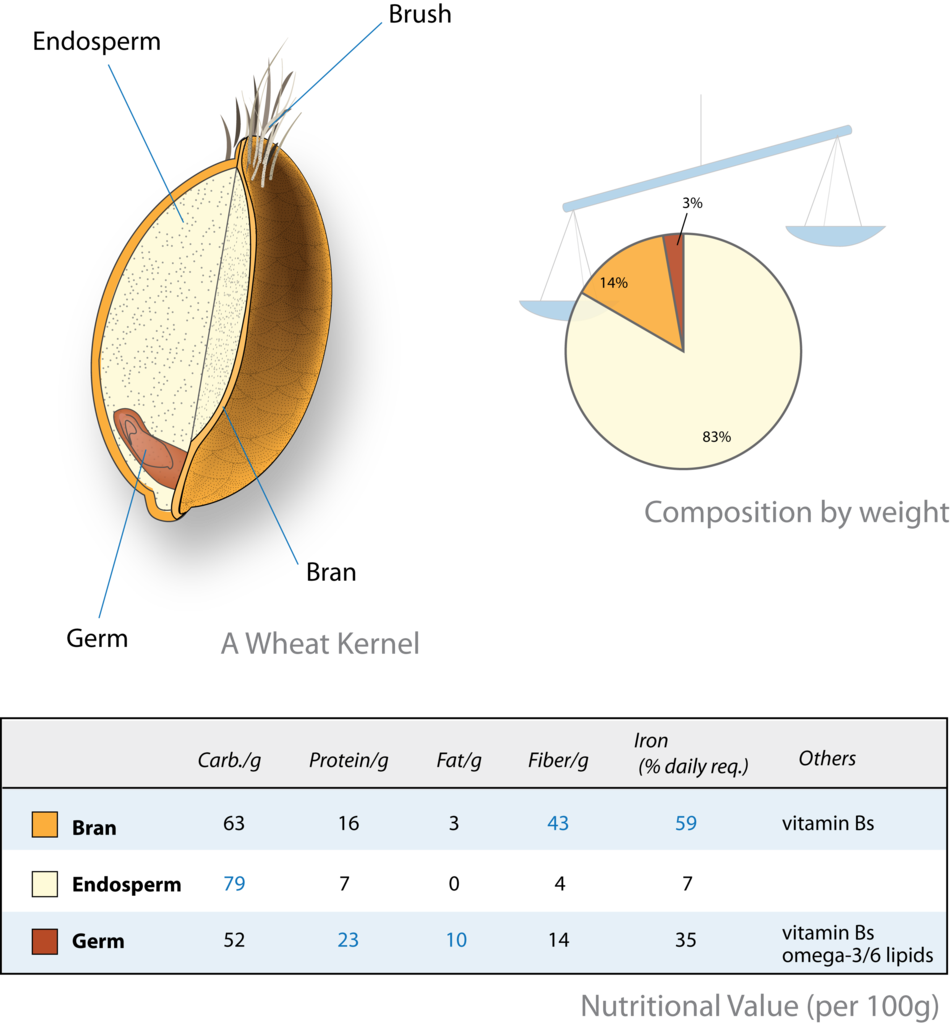
This small diagram to the right (if you click it – it enlarges) shows what is missing when only the white flour is consumed. The lack of vital nutrients in the wheat flour that we consume is creating gluten sensitivities and intolerance – not the gluten itself. Gluten itself may not be the problem.
The bran contains more protein than the endosperm, trace oils (good oils too – natural vitamin E ) a very high percentage of one’s daily allowance of fiber and iron. Not to mention the B vitamins vital for energy in our bodies.
The germ is the powerhouse for the kernel that helps it grown into a live plant – and our commercialized process strips it from us. Highest in protein, it also contains the vital oils with their vitamin E and lipids and omega oils that we seem content to pay extra for in supplements. Iron and B vitamins are also very high in the wheat germ.
We are a people who are satiated, yet extremely malnourished.
Below are some personal stories about my journey to discover the real problem for me and I suspect for many who may be under the assumption they have a gluten problem. Please listen and watch to gain more information than is not included in this post.
You can listen to my story below and see the path that I personally took to prove that gluten was not the problem for me:
New Family Internet Radio with Millers Grain House on BlogTalkRadio
This video was one of my first on our YouTube Channel.
80+ videos later it still is one of my favorites for educating people about the benefits of home-milling.
I hope you enjoy…
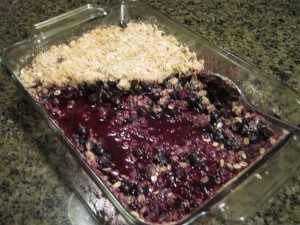 The only regret with respect to this blog entry is that I did not snap a photo quickly enough of the Easy Whole Grain Fruit Cobbler (in this case blueberry) prior to it being devoured and the visual appeal was essentially destroyed.
Oh well, the photo does show that it was an apparent favorite! I guess that counts for something, right? (:
The girls went to an Organic You-Pick Blueberry Orchard the other day and came home with two large bags of fresh, organic blueberries! Our favorite!
Often we make this tasty dessert from fresh fruit. However, we have additionally made it with pie filling from a can. Regardless of the fruit filling of choice, what truly “makes it” is the freshly milled flour and whole grain topping.
As with all my recipes the flour called for is freshly milled flour.
Since this recipe does not require a lot of flour, the gray storage container lid for the Wondermill helps keep even the smaller portion of left-over whole grain flour fresh for weeks in the freezer after milling .
As date of this post the Wondermill is on sale with free shipping.
Click here to see the savings.
![]()
Whole Grain Fruit Cobbler
Ingredients:
- 3 Cups of sliced fresh fruits (berries, apples, or pit fruits are best)
- Option – 2 Cans Fruit Pie Filling of choice*
- 2 TBS Arrow Root Powder *omit if using canned
- 2 TBS Organic Evaporated Cane Crystals *omit if canned
- 2 Cups Organic Whole Rolled Oats
- 1/2 Cup Freshly Milled Organic Whole Wheat Flour
- 1/2 Cup Organic Evaporated Cane Crystals
- 1/4 Cup Sucanant (may substitute Brown Sugar)
- 4 TBS softened butter
- 2 tsp vanilla
9 X 13 baking dish
Coat baking dish with either butter or non-stick spray.
In a large bowl cut up fruit to equal 3 cups (may mix and try fruit combinations). Add Corn Starch and 2TBS Cane Crystals, toss to coat. Pour out into baking dish. If using canned pie filling, simply empty cans into the baking dish.
In a clean large bowl, mix Oats, remaining Cane Crystals, Sucanant and Whole Wheat flour until combined, Cut in butter then add vanilla until combined.
Pour on top of fruit mixture (but do not pat down) to cover.
Bake at 350 degrees until top is crispy and fruit is bubbly. Remove from oven and let cook for about 10 minutes so topping gets more solid (and you don’t burn your mouth!)
Top with frozen yogurt or REAL whipped cream.
What a great way to get more whole grains into your family’s diet. They’ll LOVE this dessert and you won’t feel bad about sharing this with them!
Please leave a comment if you try this recipe – and let me know what is your favorite fruit to use in it!
Until next time…
Keep playing with your food and enJOY the journey!
If you are in the Western North Carolina area – or within driving distance to the class location – today is the last day to register for the upcoming class. Cost is only $5. Check it out and see if you can make it.
When: Saturday, July 13, 2013 – from noon to 2PM
Where: Inside the Always Ready Store – 632 West Main Street, Burnsville NC 28714
![]()
Click the class name to register….
Saturday July 13 12:00 Noon -2:00 PM
Cost – $5.00
PLEASE REGISTER NO LATER THAN 48 HRS BEFORE CLASS
SPACES ARE LIMITED
DEADLINE TO REGISTER IS NOON THURS JULY 11
REGISTER BY PAYING ONLINE OR MAKING PAYMENT BY PHONE 828.536.4988
Dehydrating is one of the best ways to prolong the harvest and halt the spoiling of fresh produce (thus saving money). It requires no electricity for storage so when the power goes out, you still have shelf stable food available without all the added preservatives.
This is a class for the basics of getting started. We’ll share some ideas of what dehydrates well, what doesn’t and some things you thought maybe couldn’t BE dehydrated that can!
- Samples and recipes for some things will be included.
- Proper Storage instructions for your dehydrated foods.
- Re-hydration tips.
- Non-Electric options to dehydrating.
SPACES ARE LIMITED
DEADLINE TO REGISTER IS NOON THURS JULY 11
REGISTER BY PAYING ONLINE OR MAKING PAYMENT BY PHONE 828.536.4988
Refunds offered if:
- Class is cancelled by us
- Class is rescheduled by us
- You can cancel for refund 2 days (48hrs) before the Class
FOR A SELF-SUSTAINING LIFE


