
If you are in the Western North Carolina area – or within driving distance to the class location – today is the last day to register for the upcoming class. Cost is only $5. Check it out and see if you can make it.
When: Saturday, July 13, 2013 – from noon to 2PM
Where: Inside the Always Ready Store – 632 West Main Street, Burnsville NC 28714
![]()
Click the class name to register….
Saturday July 13 12:00 Noon -2:00 PM
Cost – $5.00
PLEASE REGISTER NO LATER THAN 48 HRS BEFORE CLASS
SPACES ARE LIMITED
DEADLINE TO REGISTER IS NOON THURS JULY 11
REGISTER BY PAYING ONLINE OR MAKING PAYMENT BY PHONE 828.536.4988
Dehydrating is one of the best ways to prolong the harvest and halt the spoiling of fresh produce (thus saving money). It requires no electricity for storage so when the power goes out, you still have shelf stable food available without all the added preservatives.
This is a class for the basics of getting started. We’ll share some ideas of what dehydrates well, what doesn’t and some things you thought maybe couldn’t BE dehydrated that can!
- Samples and recipes for some things will be included.
- Proper Storage instructions for your dehydrated foods.
- Re-hydration tips.
- Non-Electric options to dehydrating.
SPACES ARE LIMITED
DEADLINE TO REGISTER IS NOON THURS JULY 11
REGISTER BY PAYING ONLINE OR MAKING PAYMENT BY PHONE 828.536.4988
Refunds offered if:
- Class is cancelled by us
- Class is rescheduled by us
- You can cancel for refund 2 days (48hrs) before the Class
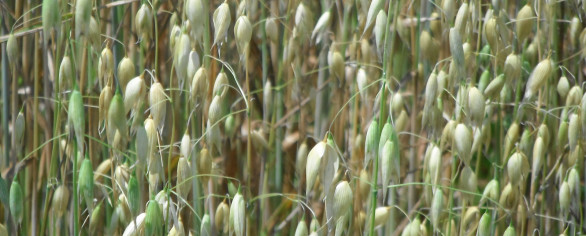
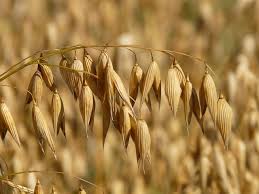
Oat groats are such extremely versatile little grains!
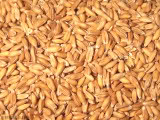
They can be milled by a grain mill (when still a whole grain) in to oat flour. Although not ideal for making use of in yeast breads as the single flour, the flour can be included as part of the required flour, yet oat flour can be utilized practically entirely as a substitute in various other baked goods not requiring yeast.
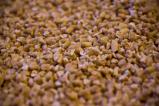
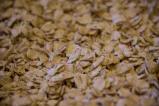
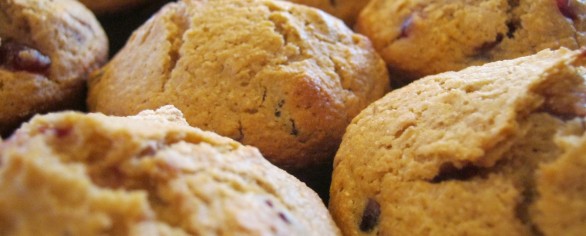
Oat Groats can likewise be utilized as Steel Cut Cereal (see picture at the right) and prepared as a thicker, chewier variation of oatmeal, included in a selection of warm dishes and baked/cooked goods.
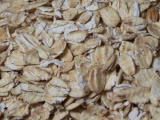
They can be rolled with a flaker turned into the old made rolled oats that the majority of individuals know them by. (pictured to the left)
Once rolled, they can then be chopped into finer pieces using the food processor utilizing the S-blade and turned into healthy Quick Oats! See this video – http://www.youtube.com/thewheatguy#p/u/31/CR6En56LNUU
From one extremely versatile grain, you could make so very many different food staples. Such a great space saver for long term food storage space and a healthy and balanced option to fast fix foods with that contain harmful additives.

For more tips to how much variety this one grain (oats) can give you – you may enjoy this short radio show “Getting Grain Specific: Sewing some (wild) oats” – Just fast forward to about minute 10:00 because there were terrible technical difficulties… but there is still some good info! (: *embarrassed smile*
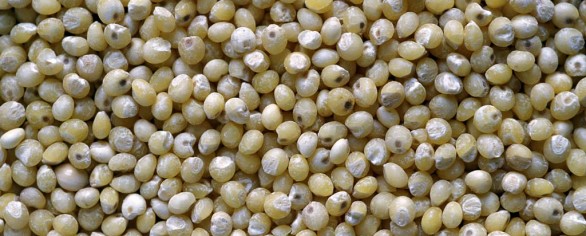
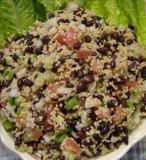
 This Gluten Free: Easy Millet & Veggie Salad is a great summer treat.
Commonly used in gluten free diets, I’ve found this grain is even more versatile when used whole rather than milled into flour. I like the simplicity of it and the texture. It rivals the texture of couscous (which is not a grain at all but a small durum wheat pasta) holding it’s form and shape well even after over cooking. It is an excellent option to replace rice and other whole grain side dishes.
For those warm summer nights and easy summer lunches, this recipe is both filling and cool to keep the kitchen from becoming a hot spot.
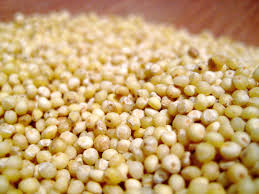
First be sure you are using food grade millet. Be sure it is fit for human consumption and not bird seed.
To cook basic, plain millet:
Rinse and drain 1 cup of millet. Set aside. In a medium saucepan, bring 2 1/2 cups water and the 1 cup millet to a boil. Cover, reduce heat to medium-low, and cook 15 minutes, much like rice until liquid absorbs. Remove from heat and let sit covered with a towel for 3-5 more minutes. This will be approximately 2.5 Cups in volume when done.
Once the millet is cooked and cooled, the opportunities for use are almost endless…
This easy recipe is my very favorite millet recipes used as a side, as a quick lunch or rolled in Nori as veggie sushi:
Millet and Veggie Salad
Ingredients:
1.5 Cups Cooked Organic Millet
1/4 Cup Cubed Cucumbers
1/4 Cup Diced Onions (red, scallions or white)
1/4 Cup Frozen Peas/Carrots
3 TBS Low fat Italian Dressing
Optional:
1/4 Cup cooked Organic Black Beans (pictured above – making this a complete meal with protein)
1/2 an Avocado Cubed*
1/4 Cup Cubed Tomato**
Mix all together in a large bowl or a container that can be covered and refrigerated for several hours. Overnight is best.
Serve chilled.
Lasts for almost a week in the fridge.
*Avocados added separately before serving, due to oxidation.
**Add Tomato separately upon serving due to easily spoiled.
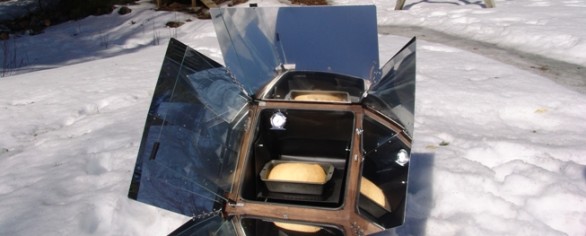
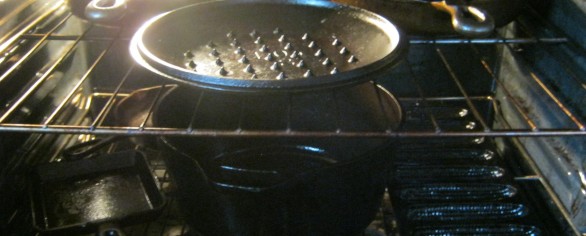
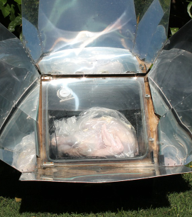 It’s always a joy for me to teach my Solar Cooking class that I have this upcoming Saturday. Cooking with the sun is not only economical, but also resourceful! Think about what you would do if your power were down?
The sun is (Lord Willing) a renewable source of energy on which we can usually rely most days. Why not harness it to do something we usually do most days – cook!
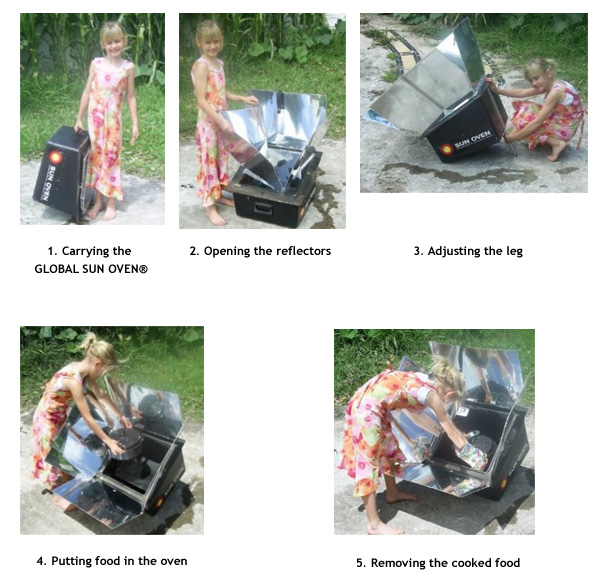
Not only am I teaching this class to show folks the difference between a home-made pizza box solar cooker, another solar  cooker (which I do not carry) and the Global Sun Oven – but also the NEW All AMERICAN Sun Oven with some really great features specific to our American cookware and more.
The updates and new features really do make this like a grown up ‘easy bake oven’ (I’ve said that a lot – because it’s more fun and work to use it!)
Also this Saturday (right after the class) I have an interview with the Executive President of Global Sun Ovens International, Paul Munsen. You can listen to that interview and get even more info: HERE
 So easy to use and so fun!
If you’re reading this blog – we would like to offer you a discount for a limited time on either of the Sun Oven Options we carry (Global Sun Oven OR All American Sun Oven).
Just put the code MGHBLOG in at check out and save $10 on any purchase of a Sun Oven (shipping is included for free) … as our way saying ‘Thank you!’ and our hope that you too will enjoy this versatile alternative cooking option!
Take a little trip with me, if you will, down memory lane…
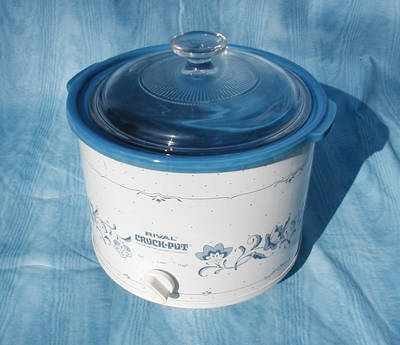
The first crock pot that I ever owned looked quite similar to the one pictured here that I saw for sale on eBay. I really don’t know the year, make or model but I do know the sentimental attachment to it. It had two settings – high and low. No automatic turn off time, no warming option if we came home later, no removable crock (this puppy was all one piece) and only one compartment for food.
The one thing it did do was a realistic LOW setting.
There were several models like this that seemed to be like our right hand in the kitchen when the kids were little, work was late and family was busy that helped many of us put a hot home-made meal on the table!
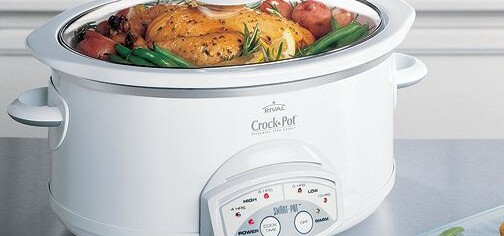
Then, enter the idea that we could improve on the one chamber simpleton that we reminisce about with fondness and we opted for one with more variations….like this one pictured here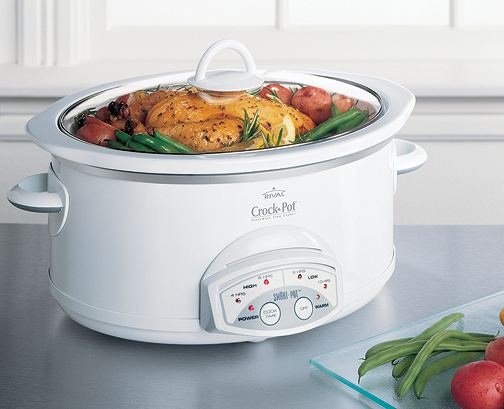 . The singular interior crock came out making it much easier to wash and could be replaced with an equally easy to clean dual chamber ceramic crock, thus allowing two different items to be slow cooked at the same time. Also there were multiple time and temp settings with a warming time if we perhaps were a bit delayed getting home to avoid over cooking.
This seemed to be a great improvement on the one-pot wonder from years gone by. I did move to making many a meal in the larger crock pot both for the ease of wash up and the need for larger meals – the kids were in fact growing, as kids will do. But one flaw I never quite overcame puzzled me until just recently. Even when set on low, this crock pot got too hot!
All the kids are grown and gone now – but I finally figured out how to make a too-hot low heat work better. Now please note, this will not work if your crock pot turns off with the break in electrical current (such as the one above does)…but if you have one that is too hot but stays on a simple setting, you can fix it this way.
Plug it in to a lamp timer.

Chances are you have something like this or you can find them at thrift stores and garage sales for pennies. Simply set it to go on an hour and off the next all the way around the timer. Plug in the crock pot (one that stays on even if the current breaks) and set it on low.
This will work well if you are hoping to warm soup that has pasta or rice (which can become obliterated in too high of heat) or you simply want to make sure you don’t scorch the sides of a smaller serving while keeping it on the lowest possible simmer all day.
I found this to work well for heating food that had already been cooked and keeping things hot enough to avoid spoilage without over cooking them.
Here’s a confession: I still have and frequently use my old, one pot wonder…it still works fine!
Best Blessings!
Donna Miller
Millers Grain House – Bulk Route
Millers Grain House – FAQ’s, Blog, Radio & MoreThank you for allowing us to serve you. It is our pleasure!
Deut 28:5 – “A blessing upon your grain-basket and kneading-bowl.”
Feel free to contact our office via email or call during business hours.
Mon – Thurs 9:00-5:00, Fri 9:00-4:00 Eastern Time (Closed Sat & Sun)
828.536.4988
By now, you’ve likely heard the drastic affects that will take place on our food costs shortly after 2013 begins. Don’t let the pending price hike catch you off guard.
If you are in our area – check to see if you’re on the delivery route. If you’re not, we do ship orders out of our area (usually under 70lbs) with a shipping carrier of your choosing (USPS or UPS).
Stock up now by buying bulk foods before the squeeze is put on your pantry budget for the new year.

Delivery Route Dates:
Orders Shipped Out of Delivery Area:
Best Blessings!
Joseph & Donna Miller, Owners
Millers Grain House Bulk Delivery Route Site
Thank you for allowing us to serve you. It is our pleasure!
Deut 28:5 – “A blessing upon your grain-basket and kneading-bowl.”
Feel free to contact our office via email or call during business hours.
Mon – Thurs 9:00-5:00, Fri 9:00-4:00 Eastern Time (Closed Sat & Sun)
828.536.4988
Come Visit the NEW Millers Grain House –https://www.millersgrainhouse.com
Video Encouragement – http://www.youtube.com/MillersGrainHouse
Encouragement in the Kitchen – http://www.blogtalkradio.com/millersgrainhouse
You know that phrase made famous by the Vikings in the Capital One commercial? “What’s in Your Wallet?” – Well, let me ask: “What’s in YOUR Fridge?”
On any given day that may be a scary question for some – but for most of us after  Thanksgiving, it’s not only scary, it’s a downright daunting and overwhelming question!
The answer is a resounding LEFT OVERS!
When faced with a myriad of foods that you don’t normally eat during the year, left in odd amounts hiding or sliding around after Thanksgiving, some of us may be tempted to toss the left over food, given the turkey coma we have just induced. But do not despair… There are many things you can do with left over Thanksgiving goodies so you won’t waste your food budget by feeding it all to the dog.
Mashed Potatoes:
Portion them out into one cup servings, into baggies and freeze. When you need to thicken a soup, top a pot pie or simply have a quick side dish (seasoned with cheese, chives, garlic, etc) – these are quickly thawed and used.
Sweet Potato Casserole:
Portion this out into one half cup servings, into baggies and freeze. These make great additions for muffins and can be added in to winter squash soups. Again they are a stand alone side dish at a far later date.
Green Bean Casserole:
Given that this is usually laden with mushroom soup and fried onions – it usually doesn’t keep well for too long. Plan on tossing this into your turkey pot pie as an added green veggie and cream soup base. The onions will soften and blend with the other ingredients…no one will know that you used it there.

Cranberry Relish/Jelly:
Also another great add-in for muffins. It turns your muffins a sweet pink and you don’t have to add as much sugar as the usual recipe.
Turkey:
I’m not sure why we always have way more turkey than I think we will. After days of turkey sandwiches – it’s still HERE! So here are some thoughts…
Break the bones with the meat on them, boil and make broth that can be frozen or canned.
Then de-bone all the meat you can glean (we ended up with a gallon bag of bits) and make any number of things such as turkey and rice soup, turkey pot pie, turkey salad for wraps or sandwiches, turkey tacos (use taco seasonings), turkey barbeque on a whole wheat bun. Yes, all of these are on the menu for the next few weeks at our home. Simply label and freeze portion sizes to make the specific meal.
Once you’ve tended to the left overs and they are in their proper place (not hiding in the fridge or trashed) you can move on to some more ‘normal’ meals and enjoy the fact that you can give Thanks for having this other food on hand!
 Donna Miller is a teacher, author, sought-after speaker and trainer. She has been a both guest and host on internet and broadcast radio talk-shows and in television interviews. She enjoys teaching online and local classes & ladies retreats for people to learn whole food cooking, budget friendly techniques and preparedness skills. Donna is happily married and has three adult children, and a daughter in-law. She and her husband (Joseph) are the founders of both Millers Grain House , Your Preparation Station and are on the board of PREPARE Magazine.
On a windy, wet and snowy day – one of my favorite things to do is season my cast iron ware. This ‘chore’ takes on a warm-the-house feeling when I choose to do it in the winter. So it’s not at all a drudgery for me.
 What is ‘seasoning’ you may ask? It’s simply the act of creating an oil coating on the porous cast iron so that the foods cooked in it don’t stick. People use many different oils (solid fats and liquids) to season their cast iron.
We have a favorite two oils we use: Grape seed Oil or Coconut Oil. We use these because of their higher smoke point.
How we season our cast iron:
- Be sure the cast iron item is clean by scrubbing with very hot water and a wire brush, plastic brush or steel wool – no soap – EVER because the pan will soak up the suds and ruin. Water is alone all that is needed.
- Situate the racks in the oven to fit all sizes of the cast iron. Preheat the oven to 35O degrees.
- Generously pour the oil or grab a ‘glob’ of solidified oil and spread all along the interior, exterior and handle of the cast iron ware. Now some folks like to use a paper towel or a brush to do this…not me, I like to use my hands. This way I can feel if there are any bits of food left or flaws that need extra oil (to avoid rust). Plus, it moisturizes my hands.
- Be sure there are no puddles of oil, but that it is smoothly and evenly distributed.
- Place all the cast iron in on the racks and turn it off. Some folks say to put it in upside down, we don’t do that because I don’t want any oils dripping directly on the heated coils of the oven.
- After the oven and the cast iron wares have cooled, rub one more time to be sure to distribute any oils. Store in cabinet and you’re ready for use at any time!
Using cast iron is one of the most healthy ways to have a non-stick surface, add trace amounts of iron into your diet and, create an heirloom piece of kitchen ware that will out last you – that can be handed down to the grand-kid’s grand-kids.
________________________________________________
Donna Miller is a teacher, author, sought-after speaker and trainer. She has been a both guest and host on internet and broadcast radio talk-shows and in television interviews.
She is the hostess of “Your Preparation Station” on Preparedness Radio Network. She and her husband are the Organizers of WNC Preparedness Group in Asheville, NC. She is an Adjunct Instructor for Frontier Christian University. She teaches local classes & ladies retreats for people to learn hands skills.
She and her husband are the founders of Millers Grain House and, Your Preparation Station and are on the board of PREPARE Magazine.
Joseph and Donna have been happily married for 27 years and have three adult children, and one daughter in-law.
________________________________________________

Sure. Maybe you thought that today was only Columbus Day, but nay there is a more pertinent holiday that just begs to compete with the accidental finding of our home land…and that is National Fluffernutter Day.

No. This is not another word from the movie Mary Poppins, but a real iconic sandwich (or variation there of) using peanut butter and marsh mallow fluff.
Although not a healthy food as depicted in the photo to the left, on white bread, it is often associated fondly with the nostalgia of childhood and thus, to me means we can grow it up a bit by making it healthier and still enjoy some of the fun too!
So let’s look at how to do this:
First – please try your hand at making your own PEANUT BUTTER. It’s easy and often less expensive. It also lacks those awful hydrogenated oils of the store bought variety. Also by using some Stevia vs. all Sugar (as the video linked above shows) you cut down on the sugar intake. Of course that ‘s a mute point was we get to the other ingredient… Marshmallow Creme, but oh well.
Marshmallow Creme is what it is. Although the one benefit is that it is a no fat food! So there, feel healthy. (o:
The last needed ingredient for your Grown-Up, Healthified, Fluffernutter Sandwich would be freshly milled 100% whole wheat bread. Here’s the recipe. If it’s made from home with all ingredients you can pronounce it’s much healthier.
Now put that sandwich together (go sparingly on the fillings, remember they do ooze) and just enjoy!
A few other options to enjoy National Fluffernutter Day are:
– Put home-made PB and Fluff on a Rice Cake
– Put home-made PB and Fluff on a Whole Wheat Pancake
– Put home-made PB and Fluff in between crackers.
It’s an odd food holiday…but a fun one we can still enjoy just a little bit if we put on our thinking caps.
We were recently asked this question. We hope that by sharing the anwer with you – we are able to help you as well.
") ————————
————————
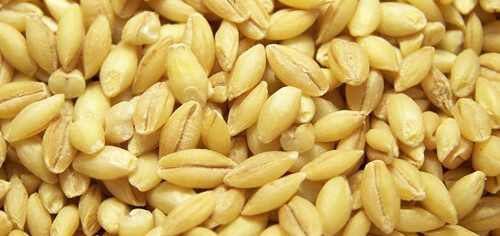
Hi guys. Love the info! My storage spot is the garage but Summer gets hot. Am I ruining the grains I’m starting to store?
————————
Answer:
Thank you for contacting us and for your kind remarks! We’re delighted to be of service.
Ruining? Not really. But you may be shortening the life of them.
Grain stays intact and fully nutritious at approx 80degrees at the hottest. Over that temp it begins to decompose/breakdown.
If the wheat germ oil inside gets consistently hot then cool then hot then cool it will make the wheat bitter tasting and thus, not so good when you go to use it. It may also not ‘act’ like regular flour either due to the density of the oil after prolonged heat.
Indoors. In dark or no exterior windows. Dry. Away from any heat source. No hotter than 80 degrees F. Is the optimum way to store grain to last for hundreds of years.
Hopefully this helps answer your question!
—
Joseph & Donna Miller, Owners
Millers Grain House
Thank you for allowing us to serve you. It is our pleasure!
Deut 28:5 – “A blessing upon your grain-basket and kneading-bowl.”
Feel free to contact our office via email or call during business hours.
Mon – Thurs 9:00-5:00, Fri 9:00-4:00 Eastern Time (Closed Sat & Sun)
![]() 1.828.536.4988
1.828.536.4988
Come Visit the NEW Millers Grain House – https://www.millersgrainhouse.
Free Video Encouragement – http://www.youtube.com/
Free Radio Show – Encouragement in the Kitchen – http://www.blogtalkradio.com/
FOR A SELF-SUSTAINING LIFE


